Hangman—PyQt5 (Part 4)

This is part 4 in a tutorial that describes how to make a Hangman game using Python and PyQt5. You can view the other parts of this series at the following links:

We have 4 small classes that we are going to cover in this potion of the tutorial. They are WinsPanel, DisplayPanel, WordPanel, and GuessedLetterPanel. In this portion, we will see QVBoxLayout, join a string together, create mock objects for unit testing, and us interhitence to promote code reuse.

Here is the complete module code for reference followed by a discussion of the individual classes for this portion of the tutorial.


from PyQt5.QtCore import QCoreApplication
from PyQt5.QtGui import QPixmap
from PyQt5.QtWidgets import (QWidget, QPushButton, QGridLayout, QApplication, QLabel, QHBoxLayout, QVBoxLayout,
                             QMainWindow, QInputDialog)

from hangman import Hangman


class HangmanPanel(QWidget):
    def __init__(self, hangman, frames):
        super().__init__()
        self.hangman = hangman
        self.frame_index = 0
        self.frames = self.create_frames(frames)
        self.label = QLabel(self)
        self.layout = QHBoxLayout(self)
        self.layout.addWidget(self.label)
        self.advance_frame()

    def create_frames(self, frames):
        frm = []
        for f in frames:
            frm.append(QPixmap(f))
        return tuple(frm)

    def advance_frame(self):
        self.label.setPixmap(self.frames[self.frame_index])
        self.frame_index += 1

        if self.frame_index >= len(self.frames):
            self.frame_index = 0

    def reset_hangman(self):
        self.frame_index = 0
        self.advance_frame()


class LetterPanel(QWidget):
    def __init__(self, hangman):
        super().__init__()
        self.hangman = hangman
        self.create_buttons()
        self.grid = QGridLayout(self)
        self.position_buttons()

    def create_buttons(self):
        letters = ('A', 'B', 'C', 'D', 'E',
                   'F', 'G', 'H', 'I', 'J',
                   'K', 'L', 'M', 'N', 'O',
                   'P', 'Q', 'R', 'S', 'T',
                   'U', 'V', 'W', 'X', 'Y', 'Z')
        buttons = []
        for l in letters:
            buttons.append(QPushButton(l, self))
        self.buttons = tuple(buttons)

    def position_buttons(self):
        positions = [(i, j) for i in range(7) for j in range(4)]
        buttons = list(self.buttons)
        buttons.reverse()

        for pos in positions:
            if buttons:
                self.grid.addWidget(buttons.pop(), *pos)

    def activate_all(self):
        for button in self.buttons:
            button.setEnabled(True)


class WinsPanel(QWidget):
    def __init__(self, hangman):
        super().__init__()
        self.hangman = hangman

        self.label = QLabel(self)
        self.label.setText('Wins')

        self.win_label = QLabel(self)
        self.win_label.setText('0')

        self.layout = QHBoxLayout(self)
        self.layout.addWidget(self.label)
        self.layout.addWidget(self.win_label)

    def update_wins(self):
        self.win_label.setText(str(hangman.wins))

class DisplayPanel(QWidget):
    def __init__(self, hangman):
        super().__init__()
        self.hangman = hangman

        self.label = QLabel(self)
        self.word_label = QLabel(self)

        self.layout = QVBoxLayout(self)
        self.layout.addWidget(self.label)
        self.layout.addWidget(self.word_label)


class WordPanel(DisplayPanel):
    def __init__(self, hangman):
        super().__init__(hangman)

        self.label.setText('Current Word')
        self.update_word()

    def update_word(self):
        self.word_label.setText(' '.join(self.hangman.display_letters))


class GuessedLetterPanel(DisplayPanel):
    def __init__(self, hangman):
        super().__init__(hangman)

        self.label.setText("Letters Already Guessed")
        self.update_letters()

    def update_letters(self):
        self.word_label.setText(', '.join(self.hangman.guessed_letters))


class HangmanWindow(QMainWindow):
    def __init__(self, hangman):
        super().__init__()
        self.hangman = hangman

        self.wins_panel = WinsPanel(hangman)
        self.hangman_panel = HangmanPanel(hangman, ['hangman_0.png',
                                                    'hangman_1.png',
                                                    'hangman_2.png',
                                                    'hangman_3.png',
                                                    'hangman_4.png',
                                                    'hangman_5.png',
                                                    'hangman_6.png',
                                                    'hangman_7.png'])
        self.word_panel = WordPanel(hangman)
        self.guessed_letter_panel = GuessedLetterPanel(hangman)
        self.letter_panel = LetterPanel(hangman)

        central_widget = QWidget()
        central_layout = QHBoxLayout(central_widget)

        left_widget = QWidget()
        left_layout = QVBoxLayout(left_widget)
        left_layout.addWidget(self.wins_panel)
        left_layout.addWidget(self.hangman_panel)
        left_layout.addWidget(self.word_panel)
        left_layout.addWidget(self.guessed_letter_panel)

        right_widget = QWidget()
        right_layout = QHBoxLayout(right_widget)
        right_layout.addWidget(self.letter_panel)

        central_layout.addWidget(left_widget)
        central_layout.addWidget(right_widget)

        self.connect_listeners()
        self.setCentralWidget(central_widget)
        self.setWindowTitle('Hangman')
        self.show()

    def connect_listeners(self):
        for button in self.letter_panel.buttons:
            button.clicked.connect(self.on_letter_button_click)

    def on_letter_button_click(self):
        sender = self.sender()

        letter = sender.text()
        sender.setEnabled(False)

        current_guess = hangman.guesses

        self.hangman.guess_letter(letter)
        self.guessed_letter_panel.update_letters()
        self.word_panel.update_word()

        if current_guess < hangman.guesses:
            self.hangman_panel.advance_frame()

        if hangman.check_win():
            self.wins_panel.update_wins()
            self.show_win()
        elif hangman.check_lose():
            self.show_lose()

    def show_win(self):
        items = ('Yes', 'No')
        item, ok = QInputDialog.getItem(self, 'You Win! Play again?', 'Choice:', items, 0, False)
        if ok and item == 'Yes':
            self.reset_game()
        else:
            QCoreApplication.instance().quit()

    def show_lose(self):
        items = ('Yes', 'No')
        item, ok = QInputDialog.getItem(self, 'You Lost! Play again?', 'Choice:', items, 0, False)
        if ok and item == 'Yes':
            self.reset_game()
        else:
            QCoreApplication.instance().quit()

    def reset_game(self):
        hangman.start_game()
        self.wins_panel.update_wins()
        self.hangman_panel.reset_hangman()
        self.word_panel.update_word()
        self.guessed_letter_panel.update_letters()
        self.letter_panel.activate_all()


if __name__ == '__main__':
    app = QApplication(sys.argv)
    hangman = Hangman('words.txt', 6)
    win = HangmanWindow(hangman)
    sys.exit(app.exec_())

WinsPanel

Our application supports tracking the number of times the user wins the game. We can display this information with a panel that creates two QLabels and displays them horizontally.

class WinsPanel(QWidget):
    def __init__(self, hangman):
        super().__init__()
        self.hangman = hangman

        self.label = QLabel(self)
        self.label.setText('Wins')

        self.win_label = QLabel(self)
        self.win_label.setText('0')

        self.layout = QHBoxLayout(self)
        self.layout.addWidget(self.label)
        self.layout.addWidget(self.win_label)

    def update_wins(self):
        self.win_label.setText(str(hangman.wins))

As always, we can test this panel in isolation by using the following code snippet.

if __name__ == '__main__':
    app = QApplication(sys.argv)
    win = WinsPanel(None)
    win.show()
    sys.exit(app.exec_())

When run, the panel looks like the following screen shot
WinsPanel copy

Let’s walk through the code

__init__

The WinPanel’s __init__ method does the job of creating two QLabel objects and a QHBoxLayout. Here is the code for __init__ followed by an explanation.

def __init__(self, hangman):
    super().__init__()
    self.hangman = hangman

    self.label = QLabel(self)
    self.label.setText('Wins')

    self.win_label = QLabel(self)
    self.win_label.setText('0')

    self.layout = QHBoxLayout(self)
    self.layout.addWidget(self.label)
    self.layout.addWidget(self.win_label)

There really isn’t anything here that we haven’t seen before. We begin by calling QWidget’s __init__ method so that we can add widgets to this panel. This panel also takes a Hangman object. The next two lines create a QLabel with the text ‘Wins’.

The following the creation of the first QLabel, we create another QLabel and assign it to self.win_label with a text of ‘0’. This label will get updated in the update_wins function below. It will display the number of games of Hangman the user won.

The final three lines create a QHBoxLayout to arrange controls from left to right and then we use addWidget to add the two QLabel objects that we created.

update_wins

The update_wins function get’s called by the application to update the win_label’s text.

def update_wins(self):
     self.win_label.setText(str(hangman.wins))

The Hangman object has a wins property. Remember that our application’s logic is seperate from the presentation (the UI), which is why this class is grabbing the value from Hangman rather than keeping it’s own win count. All we are doing is using QLabel’s setText method to update the text in the label. Since hangman.wins is an integer, we need to convert it to a string using the str function to avoid a type error.

DisplayPanel

WordPanel and GuessedLetterPanel are incredibly similar and even use the same controls and layouts. Whenever we have patterns in our code, we should use the “Do Not Repeat” principle. In this case, we are going to define a class that is only used as a base class for WordPanel and GuessedLetterPanel. Here is the code followed by an explanation.

class DisplayPanel(QWidget):
    def __init__(self, hangman):
        super().__init__()
        self.hangman = hangman

        self.label = QLabel(self)
        self.word_label = QLabel(self)

        self.layout = QVBoxLayout(self)
        self.layout.addWidget(self.label)
        self.layout.addWidget(self.word_label)

__init__

The DisplayPanel class only has one method __init__. This class does the job of assigning a hagnman object for later use and creating two QLabel objects. You will notice that the QLabel objects do not have their text set.

We also meet a new layout manager here. The QVBoxLayout is used to stack widgets from top to bottom. We create the QVBoxLayout and then add both of our labels to the layout manager.

WordPanel

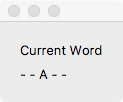
WordPanel does the job of displaying the user’s correct guesses. It works with Hangman’s display_letters list object to display the letters the user has guessed correctly or show’s dashes (‘-‘) for letters that are still unknown to the user. Here is the code for this class.

class WordPanel(DisplayPanel):
    def __init__(self, hangman):
        super().__init__(hangman)

        self.label.setText('Current Word')
        self.update_word()

    def update_word(self):
        self.word_label.setText(' '.join(self.hangman.display_letters))

Using this code, we can run this panel in isolation

if __name__ == '__main__':
    class MockHangman:
        def __init__(self):
            self.display_letters = ['-', '-', 'A', '-', '-']

    app = QApplication(sys.argv)
    win = WordPanel(MockHangman())
    win.show()
    sys.exit(app.exec_())

You will notice in this case we need a special MockHangman class to test WordPanel. Python is a dynamically typed language. As long as objects satisfy an interface, Python could care less about the kind of object. This feature (often called duck typing) is a major advantage of Python.

WordPanel needs a Hangman object that has a display_letters variable. Since our MackHangman has this variable, it can satisfy WordPanel’s Hangman dependency. Defining classes on the fly like we did above makes it really easy to test Python objects in isolation.

Our panel looks like this when it’s run
WordPanel copy

Now let’s discuss the code

__init__

What is special about WordPanel’s __init__ is that it is so short. Here is the code for the __init__ method for this class.

def __init__(self, hangman):
    super().__init__(hangman)

    self.label.setText('Current Word')
    self.update_word()

You will notice that we call DisplayPanel’s __init__ and pass the hangman object to the parent class’s constructor. We set the text of the label also, but we never create the QLabel object here. That’s already been done for us in DisplayPanel’s __init__. We have direct access to the QLabel right away. We don’t even worry about creating a layout manager here since that also was taken care of for us already.

update_word

We are going to see how to combine a list into a string.

def update_word(self):
    self.word_label.setText(' '.join(self.hangman.display_letters))

The ' '.join(self.hangman.display_letters) is the code of interest here. Whenever we want to combine elements of an iterable (lists are iterables) into a string, we start with a string that is used as a seperator. In our case, we are using a blank space ‘ ‘ that appears between every letter. If you don’t want a space, just use an empty string ”. Now we use the join method on string, which accepts any iterable. Our iterable is self.hangman.display_letters. So each element in self.hangman.display_letters is joined into a single string.

At this point, we just use QLabels.setText method to update the text in the string.
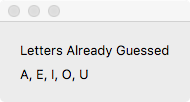
GuessedLetterPanel

GuessedLetterPanel’s job is to display the letters the user has guessed so far. Here is the code for this class.

class GuessedLetterPanel(DisplayPanel):
    def __init__(self, hangman):
        super().__init__(hangman)

        self.label.setText("Letters Already Guessed")
        self.update_letters()

    def update_letters(self):
        self.word_label.setText(', '.join(self.hangman.guessed_letters))

We can test this class as a stand alone component. However, to do so, we need a Mock Hangman object. Here is the code to run this panel in isolation.

if __name__ == '__main__':
    class MockHangman:
        def __init__(self):
            self.guessed_letters = ['A', 'E', 'I', 'O', 'U']

    app = QApplication(sys.argv)
    win = GuessedLetterPanel(MockHangman())
    win.show()
    sys.exit(app.exec_())

This is what our panel looks like when it’s ran in isolation.
GuessedLettersPanel copy

__init__

Once again, GuessedLetterPanel is a child class of DisplayPanel. For this reason, we don’t need to worry about things like creating our QLabel objects or our layout. We just set the variables to the values we need them at and let the parent class do the work for us.

def __init__(self, hangman):
    super().__init__(hangman)

    self.label.setText("Letters Already Guessed")
    self.update_letters()
[/code

<h3>update_letters<h3>
This method is another example of how to join an iterable into a string.

def update_letters(self):
    self.word_label.setText(', '.join(self.hangman.guessed_letters))

In this case, we use ', ' as our letter seperator rather than a blank space.

Conclusion

We convered quite a bit of ground in this section. The code in these classes showed us how to use QVBoxLayout. We learned how to join strings together into a single string using String's join method. Furthermore, we saw how to create mock objects that help us with unit testing our classes. Finally, we saw how to use inheritance to group similar code together.

Hangman—PyQt5 (Part 3)

This is part 3 in a tutorial that describes how to make a Hangman game using Python and PyQt5. You can view the other parts of this series at the following links:

The next step…

In Part 2, we created a panel that shows our man getting hanged as the user inputs incorrect guesses. We are now going to continue by discussing the LetterPanel, which is a panel that holds 26 QPushButtons. Each QPushButton will correspond to a letter of the alphabit.

This is the code for the entire module for reference.

import sys

from PyQt5.QtCore import QCoreApplication
from PyQt5.QtGui import QPixmap
from PyQt5.QtWidgets import (QWidget, QPushButton, QGridLayout, QApplication, QLabel, QHBoxLayout, QVBoxLayout,
                             QMainWindow, QInputDialog)

from hangman import Hangman


class HangmanPanel(QWidget):
    def __init__(self, hangman, frames):
        super().__init__()
        self.hangman = hangman
        self.frame_index = 0
        self.frames = self.create_frames(frames)
        self.label = QLabel(self)
        self.layout = QHBoxLayout(self)
        self.layout.addWidget(self.label)
        self.advance_frame()

    def create_frames(self, frames):
        frm = []
        for f in frames:
            frm.append(QPixmap(f))
        return tuple(frm)

    def advance_frame(self):
        self.label.setPixmap(self.frames[self.frame_index])
        self.frame_index += 1

        if self.frame_index >= len(self.frames):
            self.frame_index = 0

    def reset_hangman(self):
        self.frame_index = 0
        self.advance_frame()


class LetterPanel(QWidget):
    def __init__(self, hangman):
        super().__init__()
        self.hangman = hangman
        self.create_buttons()
        self.grid = QGridLayout(self)
        self.position_buttons()

    def create_buttons(self):
        letters = ('A', 'B', 'C', 'D', 'E',
                   'F', 'G', 'H', 'I', 'J',
                   'K', 'L', 'M', 'N', 'O',
                   'P', 'Q', 'R', 'S', 'T',
                   'U', 'V', 'W', 'X', 'Y', 'Z')
        buttons = []
        for l in letters:
            buttons.append(QPushButton(l, self))
        self.buttons = tuple(buttons)

    def position_buttons(self):
        positions = [(i, j) for i in range(7) for j in range(4)]
        buttons = list(self.buttons)
        buttons.reverse()

        for pos in positions:
            if buttons:
                self.grid.addWidget(buttons.pop(), *pos)

    def activate_all(self):
        for button in self.buttons:
            button.setEnabled(True)


class WinsPanel(QWidget):
    def __init__(self, hangman):
        super().__init__()
        self.hangman = hangman

        self.label = QLabel(self)
        self.label.setText('Wins')

        self.win_label = QLabel(self)
        self.win_label.setText('0')

        self.layout = QHBoxLayout(self)
        self.layout.addWidget(self.label)
        self.layout.addWidget(self.win_label)

    def update_wins(self):
        self.win_label.setText(str(hangman.wins))


class DisplayPanel(QWidget):
    def __init__(self, hangman):
        super().__init__()
        self.hangman = hangman

        self.label = QLabel(self)
        self.word_label = QLabel(self)

        self.layout = QVBoxLayout(self)
        self.layout.addWidget(self.label)
        self.layout.addWidget(self.word_label)


class WordPanel(DisplayPanel):
    def __init__(self, hangman):
        super().__init__(hangman)

        self.label.setText('Current Word')
        self.update_word()

    def update_word(self):
        self.word_label.setText(' '.join(self.hangman.display_letters))


class GuessedLetterPanel(DisplayPanel):
    def __init__(self, hangman):
        super().__init__(hangman)

        self.label.setText("Letters Already Guessed")
        self.update_letters()

    def update_letters(self):
        self.word_label.setText(', '.join(self.hangman.guessed_letters))


class HangmanWindow(QMainWindow):
    def __init__(self, hangman):
        super().__init__()
        self.hangman = hangman

        self.wins_panel = WinsPanel(hangman)
        self.hangman_panel = HangmanPanel(hangman, ['hangman_0.png',
                                                    'hangman_1.png',
                                                    'hangman_2.png',
                                                    'hangman_3.png',
                                                    'hangman_4.png',
                                                    'hangman_5.png',
                                                    'hangman_6.png',
                                                    'hangman_7.png'])
        self.word_panel = WordPanel(hangman)
        self.guessed_letter_panel = GuessedLetterPanel(hangman)
        self.letter_panel = LetterPanel(hangman)

        central_widget = QWidget()
        central_layout = QHBoxLayout(central_widget)

        left_widget = QWidget()
        left_layout = QVBoxLayout(left_widget)
        left_layout.addWidget(self.wins_panel)
        left_layout.addWidget(self.hangman_panel)
        left_layout.addWidget(self.word_panel)
        left_layout.addWidget(self.guessed_letter_panel)

        right_widget = QWidget()
        right_layout = QHBoxLayout(right_widget)
        right_layout.addWidget(self.letter_panel)

        central_layout.addWidget(left_widget)
        central_layout.addWidget(right_widget)

        self.connect_listeners()
        self.setCentralWidget(central_widget)
        self.setWindowTitle('Hangman')
        self.show()

    def connect_listeners(self):
        for button in self.letter_panel.buttons:
            button.clicked.connect(self.on_letter_button_click)

    def on_letter_button_click(self):
        sender = self.sender()

        letter = sender.text()
        sender.setEnabled(False)

        current_guess = hangman.guesses

        self.hangman.guess_letter(letter)
        self.guessed_letter_panel.update_letters()
        self.word_panel.update_word()

        if current_guess < hangman.guesses:
            self.hangman_panel.advance_frame()

        if hangman.check_win():
            self.wins_panel.update_wins()
            self.show_win()
        elif hangman.check_lose():
            self.show_lose()

    def show_win(self):
        items = ('Yes', 'No')
        item, ok = QInputDialog.getItem(self, 'You Win! Play again?', 'Choice:', items, 0, False)
        if ok and item == 'Yes':
            self.reset_game()
        else:
            QCoreApplication.instance().quit()

    def show_lose(self):
        items = ('Yes', 'No')
        item, ok = QInputDialog.getItem(self, 'You Lost! Play again?', 'Choice:', items, 0, False)
        if ok and item == 'Yes':
            self.reset_game()
        else:
            QCoreApplication.instance().quit()

    def reset_game(self):
        hangman.start_game()
        self.wins_panel.update_wins()
        self.hangman_panel.reset_hangman()
        self.word_panel.update_word()
        self.guessed_letter_panel.update_letters()
        self.letter_panel.activate_all()


if __name__ == '__main__':
    app = QApplication(sys.argv)
    hangman = Hangman('words.txt', 6)
    win = HangmanWindow(hangman)
    sys.exit(app.exec_())

We are going to focus on the LetterPanel of this code. The LetterPanel explores some other features of PyQt5 which include GridLayout and QPushButton.

Letter Panel

This is the code for the letter panel

class LetterPanel(QWidget):
    def __init__(self, hangman):
        super().__init__()
        self.hangman = hangman
        self.create_buttons()
        self.grid = QGridLayout(self)
        self.position_buttons()

    def create_buttons(self):
        letters = ('A', 'B', 'C', 'D', 'E',
                   'F', 'G', 'H', 'I', 'J',
                   'K', 'L', 'M', 'N', 'O',
                   'P', 'Q', 'R', 'S', 'T',
                   'U', 'V', 'W', 'X', 'Y', 'Z')
        buttons = []
        for l in letters:
            buttons.append(QPushButton(l, self))
        self.buttons = tuple(buttons)

    def position_buttons(self):
        positions = [(i, j) for i in range(7) for j in range(4)]
        buttons = list(self.buttons)
        buttons.reverse()

        for pos in positions:
            if buttons:
                self.grid.addWidget(buttons.pop(), *pos)

    def activate_all(self):
        for button in self.buttons:
            button.setEnabled(True)

Just like HangmanPanel, this panel inherits QWidget so that it can be used a GUI component. This allows us to nest this panel into an application window or run it as a stand alone window.

We can run it in a standalone window using the following code

if __name__ == '__main__':
    app = QApplication(sys.argv)
    win = LetterPanel(None)
    win.show()
    sys.exit(app.exec_())

This is what the panel looks like when run in isolation.
LetterPanel copy

Now let’s discuss the code in this class.

__init__

By now you should be familiar with Python’s __init__ method. Here is the code for LetterPanel’s __init__ followed by an explanation.

def __init__(self, hangman):
    super().__init__()
    self.hangman = hangman
    self.create_buttons()
    self.grid = QGridLayout(self)
    self.position_buttons()

We start by calling QWidget’s __init__ function so that we can add controls to this panel. We also supply a Hangman object to this class also.

The next line does the work of creating 26 buttons that get placed on this panel. We are going to do this in a seperate create_buttons() function. Next we need to layout the buttons into a grid pattern. QGridLayout is a powerful class that does the job of laying out components in a grid like fashion.

At this point, we have 26 buttons and a grid, but we need to actually add the buttons to the grid. Once again, we are going to use a seperate function position_buttons() and delegate this work to that function.

create_buttons

We met the create_buttons function in __init__. Here is the code followed by an explanation.

def create_buttons(self):
    letters = ('A', 'B', 'C', 'D', 'E',
               'F', 'G', 'H', 'I', 'J',
               'K', 'L', 'M', 'N', 'O',
               'P', 'Q', 'R', 'S', 'T',
               'U', 'V', 'W', 'X', 'Y', 'Z')
    buttons = []
    for l in letters:
        buttons.append(QPushButton(l, self))
    self.buttons = tuple(buttons)

We begin by creating a tuple of upper case letters, followed by an empty list of buttons. Since all of the buttons are going to do a similar job (which is sending a guessed letter to Hangman), it is much easier and much more maintainable to use a list to hold our QPushButton objects rather than using 26 or more variables for each button.

The next thing to do is iterate through each letter an create a QPushButton. The first argument of QPushButton’s __init__ method takes a string that will eventually contains the button’s text. So when we do QPushButton(l, self) we are going to set the label of the button to the current letter. Then we add the newly created QPushButton to the buttons list.

We don’t plan on adding, changing, or shuffling our buttons after the GUI is created. To write protect our data, we convert buttons to a tuple and then assign it to self.buttons.

position_buttons

We met position_buttons in the __init__ method. This function does the job of adding the buttons created in create_button to the screen.

def position_buttons(self):
    positions = [(i, j) for i in range(7) for j in range(4)]
    buttons = list(self.buttons)
    buttons.reverse()

    for pos in positions:
        if buttons:
            self.grid.addWidget(buttons.pop(), *pos)

QGridLayout uses an x,y position to add controls to the grid. So our first line is using Python’s generator statement to create a 2D list of x,y positions. We will end up with a list that is 7 rows deep and 4 columns wide.

Now, this is the one case where we need to manipulate the order of our buttons. We create a buttons list out of self.buttons (remember that self.buttons is a tuple) so that we can reverse the order of the buttons. If we forget to do this, we would have the letter ‘Z’ appear first in our grid rather than last in grid. This is becuase we are going to use the pop() method to remove the last element in a list. Therefore, we need ‘Z’ to be at the first position in the list and ‘A’ at the last position.

Now we are going to add the buttons to the grid. We are going to iterate through the positions list object. The variable pos is a tuple that contains the x,y pair of coordinates.

Now we need to check that buttons isn’t empty, so we use if buttons first to make sure we aren’t calling pop() on an empty list. As long as we still have buttons, we can add them to self.grid.addWidget. The *pos is a shortcut way of adding the x,y pair into the addWidget’s method without having to create two variables.

activate_all

This last method is used later on when we want to reset the game. It simply re-enables all disabled buttons (which get disabled after the user clicks on them).

def activate_all(self):
    for button in self.buttons:
        button.setEnabled(True)

Conclusion

We covered some new ground in this portion of the tutorial. QPushButton is a widget that creates a regular push button on the street. QGridLayout is a layout manager that positions controls on the screen in a grid like fashion. When you add widgets to the screen using grid layout, you need to supply an x,y pair so that the grid layout knows where to position each control.

Hangman—PyQt5 (Part 2)

This is the second part of a tutorial on a Hangman game written in Python using PyQt5.

In the first part of this tutorial, we created a Hangman class that handles the application logic for creating a Hangman game in Python. In this part, we will write a GUI client that uses the Hangman class.

PyQt

Qt is a cross platform application framework that includes a GUI toolkit. Python ships with tkinter as it’s standard GUI API, but I am actually more comfortable using Qt. Qt is a an object orietated framework that provides us with classes that represent controls on the screen (known as widgets).

Using Python’s OOP features, we can develop a GUI in small increments and then put them together into a single application window. That’s what we are going to do in this tutorial.

Here is the complete GUI code for hangman.

import sys

from PyQt5.QtCore import QCoreApplication
from PyQt5.QtGui import QPixmap
from PyQt5.QtWidgets import (QWidget, QPushButton, QGridLayout, QApplication, QLabel, QHBoxLayout, QVBoxLayout,
                             QMainWindow, QInputDialog)

from hangman import Hangman


class HangmanPanel(QWidget):
    def __init__(self, hangman, frames):
        super().__init__()
        self.hangman = hangman
        self.frame_index = 0
        self.frames = self.create_frames(frames)
        self.label = QLabel(self)
        self.layout = QHBoxLayout(self)
        self.layout.addWidget(self.label)
        self.advance_frame()

    def create_frames(self, frames):
        frm = []
        for f in frames:
            frm.append(QPixmap(f))
        return tuple(frm)

    def advance_frame(self):
        self.label.setPixmap(self.frames[self.frame_index])
        self.frame_index += 1

        if self.frame_index >= len(self.frames):
            self.frame_index = 0

    def reset_hangman(self):
        self.frame_index = 0
        self.advance_frame()


class LetterPanel(QWidget):
    def __init__(self, hangman):
        super().__init__()
        self.hangman = hangman
        self.create_buttons()
        self.grid = QGridLayout(self)
        self.position_buttons()

    def create_buttons(self):
        letters = ('A', 'B', 'C', 'D', 'E',
                   'F', 'G', 'H', 'I', 'J',
                   'K', 'L', 'M', 'N', 'O',
                   'P', 'Q', 'R', 'S', 'T',
                   'U', 'V', 'W', 'X', 'Y', 'Z')
        buttons = []
        for l in letters:
            buttons.append(QPushButton(l, self))
        self.buttons = tuple(buttons)

    def position_buttons(self):
        positions = [(i, j) for i in range(7) for j in range(4)]
        buttons = list(self.buttons)
        buttons.reverse()

        for pos in positions:
            if buttons:
                self.grid.addWidget(buttons.pop(), *pos)

    def activate_all(self):
        for button in self.buttons:
            button.setEnabled(True)


class WinsPanel(QWidget):
    def __init__(self, hangman):
        super().__init__()
        self.hangman = hangman

        self.label = QLabel(self)
        self.label.setText('Wins')

        self.win_label = QLabel(self)
        self.win_label.setText('0')

        self.layout = QHBoxLayout(self)
        self.layout.addWidget(self.label)
        self.layout.addWidget(self.win_label)

    def update_wins(self):
        self.win_label.setText(str(hangman.wins))


class DisplayPanel(QWidget):
    def __init__(self, hangman):
        super().__init__()
        self.hangman = hangman

        self.label = QLabel(self)
        self.word_label = QLabel(self)

        self.layout = QVBoxLayout(self)
        self.layout.addWidget(self.label)
        self.layout.addWidget(self.word_label)


class WordPanel(DisplayPanel):
    def __init__(self, hangman):
        super().__init__(hangman)

        self.label.setText('Current Word')
        self.update_word()

    def update_word(self):
        self.word_label.setText(' '.join(self.hangman.display_letters))


class GuessedLetterPanel(DisplayPanel):
    def __init__(self, hangman):
        super().__init__(hangman)

        self.label.setText("Letters Already Guessed")
        self.update_letters()

    def update_letters(self):
        self.word_label.setText(', '.join(self.hangman.guessed_letters))


class HangmanWindow(QMainWindow):
    def __init__(self, hangman):
        super().__init__()
        self.hangman = hangman

        self.wins_panel = WinsPanel(hangman)
        self.hangman_panel = HangmanPanel(hangman, ['hangman_0.png',
                                                    'hangman_1.png',
                                                    'hangman_2.png',
                                                    'hangman_3.png',
                                                    'hangman_4.png',
                                                    'hangman_5.png',
                                                    'hangman_6.png',
                                                    'hangman_7.png'])
        self.word_panel = WordPanel(hangman)
        self.guessed_letter_panel = GuessedLetterPanel(hangman)
        self.letter_panel = LetterPanel(hangman)

        central_widget = QWidget()
        central_layout = QHBoxLayout(central_widget)

        left_widget = QWidget()
        left_layout = QVBoxLayout(left_widget)
        left_layout.addWidget(self.wins_panel)
        left_layout.addWidget(self.hangman_panel)
        left_layout.addWidget(self.word_panel)
        left_layout.addWidget(self.guessed_letter_panel)

        right_widget = QWidget()
        right_layout = QHBoxLayout(right_widget)
        right_layout.addWidget(self.letter_panel)

        central_layout.addWidget(left_widget)
        central_layout.addWidget(right_widget)

        self.connect_listeners()
        self.setCentralWidget(central_widget)
        self.setWindowTitle('Hangman')
        self.show()

    def connect_listeners(self):
        for button in self.letter_panel.buttons:
            button.clicked.connect(self.on_letter_button_click)

    def on_letter_button_click(self):
        sender = self.sender()

        letter = sender.text()
        sender.setEnabled(False)

        current_guess = hangman.guesses

        self.hangman.guess_letter(letter)
        self.guessed_letter_panel.update_letters()
        self.word_panel.update_word()

        if current_guess < hangman.guesses:
            self.hangman_panel.advance_frame()

        if hangman.check_win():
            self.wins_panel.update_wins()
            self.show_win()
        elif hangman.check_lose():
            self.show_lose()

    def show_win(self):
        items = ('Yes', 'No')
        item, ok = QInputDialog.getItem(self, 'You Win! Play again?', 'Choice:', items, 0, False)
        if ok and item == 'Yes':
            self.reset_game()
        else:
            QCoreApplication.instance().quit()

    def show_lose(self):
        items = ('Yes', 'No')
        item, ok = QInputDialog.getItem(self, 'You Lost! Play again?', 'Choice:', items, 0, False)
        if ok and item == 'Yes':
            self.reset_game()
        else:
            QCoreApplication.instance().quit()

    def reset_game(self):
        hangman.start_game()
        self.wins_panel.update_wins()
        self.hangman_panel.reset_hangman()
        self.word_panel.update_word()
        self.guessed_letter_panel.update_letters()
        self.letter_panel.activate_all()


if __name__ == '__main__':
    app = QApplication(sys.argv)
    hangman = Hangman('words.txt', 6)
    win = HangmanWindow(hangman)
    sys.exit(app.exec_())

When run, this code will produce a window that looks like this screen shot.
PyQt Hangman copy

HangmanPanel

The first thing we need is a panel that shows the man getting hanged in the window as the user plays the games. We begin by using 8 images for each of the frames.

Now let’s look at the code.

class HangmanPanel(QWidget):
    def __init__(self, hangman, frames):
        super().__init__()
        self.hangman = hangman
        self.frame_index = 0
        self.frames = self.create_frames(frames)
        self.label = QLabel(self)
        self.layout = QHBoxLayout(self)
        self.layout.addWidget(self.label)
        self.advance_frame()

    def create_frames(self, frames):
        frm = []
        for f in frames:
            frm.append(QPixmap(f))
        return tuple(frm)

    def advance_frame(self):
        self.label.setPixmap(self.frames[self.frame_index])
        self.frame_index += 1

        if self.frame_index >= len(self.frames):
            self.frame_index = 0

    def reset_hangman(self):
        self.frame_index = 0
        self.advance_frame()

This class extends the QWidget class. QWidget is the super class for objects that are displayed by Qt. By inheriting from QWidget, we can uses instances of this class as a GUI component as either a nested component in a window, or as a standalone window.

The ability to display QWidgets in their own window is a huge feature of PyQt. For example, we can test that this window is working properly by adding the following lines of code to our script.

if __name__ == '__main__':
    app = QApplication(sys.argv)
    win = HangmanPanel(None, ['hangman_0.png'])
    win.show()
    sys.exit(app.exec_())

When run, we get our window.
HangmanPanel copy

By using the technique described above, we can test each component of our GUI in isolation to make sure it’s working properly before we continue. Now let’s move onto a description of this class.

__init__

Python uses an __init__ function to create an object.

def __init__(self, hangman, frames):
    super().__init__()
    self.hangman = hangman
    self.frame_index = 0
    self.frames = self.create_frames(frames)
    self.label = QLabel(self)
    self.layout = QHBoxLayout(self)
    self.layout.addWidget(self.label)
    self.advance_frame()

The first line is critical. We have to call QWidget’s __init__ method before we do anything else with this component. If we forget to do so, PyQt will throw an exception and let you know about the error.

The next line of code is our Hangman object. This is an instance of the Hangman class that we made in part 1 of the tutorial. The next variable is to track what frame we are currently on. Every time the user guesses wrong, we are going to increment frame_index by one. The frame_index variable is used to show which frame of the hangman game we are going to show.

The self.frames variable is a list of all of the possible frames that we are going to show. It uses the self.create_frames function to read each file supplied in the frames variable. That function will return QPixmap objects that represent each picture that we supplied to the program.

self.label is a QLabel control. The QLabel is a widget that is capable of displaying a picture (among other things). We are going to pass QPixmap objects to this QLabel object and display our hanging man as the game progresses.

Next we need a layout manager. This is an object that is used by Qt to position controls on the screen. QHBoxLayout is used to display components from left to right in a horizontal row. The next line self.layout.addWidget(self.label) adds the QLabel object to this screen. Finally, we want to show our starting hangman from by calling self.advance_frame() described below.

create_frames

The create_frames function is used to load our picture files from the file system and wrap them into QPixmap objects. Here is the code for this function.

def create_frames(self, frames):
    frm = []
    for f in frames:
        frm.append(QPixmap(f))
    return tuple(frm)

This begins by creating an empty frm list object. Then we iterate through each item in frames. We create a new QPixmap object, which accepts the location of the frame file on the file system. The QPixmap object is added the frm list. Since we do not want to change the frames in any way after loading them, we convert frm into a tuple (think of it as a read-only list) and return it to the caller.

advance_frame

The advance_frame function does the job of moving the program to the next frame of hangman.

def advance_frame(self):
    self.label.setPixmap(self.frames[self.frame_index])
    self.frame_index += 1

    if self.frame_index >= len(self.frames):
        self.frame_index = 0

We created a QLabel object in the __init__ function and stored it in self.label. We also created our frames as a tuple of QPixmaps in create_frames. We can change the frame that is displayed by using QLabel.setPixmap() and passing a QPixmap to it.

So what this code is doing on line one is looking up a QPixmap located at the current frame_index. On the second line, we increment self.frame_index by one. Our next section of code does bounds checking on the self.frames tuple. If we at the end of the frames, we just reset self.frame_index to zero so that we don’t try and go past the number of frames that we have.

reset_hangman

The final method of the HangmanPanel class gets used to reset the game.

def reset_hangman(self):
    self.frame_index = 0
    self.advance_frame()

You will notice that this code repeats some of what is done in the constructor. It resets the frame_index to 0 and then calls advance_frame to display the first frame in the sequence.

Conclusion

This part of the tutorial discusses the first GUI component of our Hangman GUI. PyQt5 applications are easy to develop because we can work on each component in isolation and make sure things are working properly before continuing. In this post, we worked on the portion of the GUI that displays our man getting hanged as the user guesses wrong.

Hangman—PyQt5 (Part 1)

The is the first part of a 5 part series. You can view the other parts

Hangman games are a popular programming game that many of my students are asked to implement. I decided to do one in Python using the PyQ5 library.

Before working on this tutorial, you may need to install pyqt5 on your system.

pip3 install pyqt5

Before we begin…

We need to create a file that holds our list of words. Here is one that can help you get started.

Kitties
Python
Foliage
Assorted
Soda
Stream
Democracy
Blog
Selection
Insertion

This file will be called words.txt throughout this tutorial. It needs to get placed in the same folder as the rest of our scripts.

Application Logic

It is always advisable to seperate the logic of your application from the display. This let’s us reuse our application code but plug it into different displayes. For example, this tutorial uses PyQt5, but in theory, we may wish to have a Tkinter (the standard Python GUI toolkit) version of this program also. When we seperate application logic from display, we can write different clients for the same program.

Let’s begin with the code first and then walk through it. Here is the core application logic for our hangman game.

from random import randint

class Hangman:
    def __init__(self, word_list_file, allowed_guesses=15):
        self.words = self.read_word_file(word_list_file)
        self.allowed_guesses = allowed_guesses
        self.start_game()
        self.wins = 0

    def start_game(self):
        self.secret_word = self.pick_secret_word()
        self.display_letters = self.create_display_letters()
        self.guessed_letters = []
        self.guesses = 0

    @staticmethod
    def read_word_file(word_list_file):
        word_list = []
        with open(word_list_file, 'r') as f:
            for line in f:
                word_list.append(line.rstrip())
        return word_list

    def pick_secret_word(self):
        index = randint(0, len(self.words) - 1)
        return self.words[index].upper()

    def create_display_letters(self):
        letters = []
        for _ in self.secret_word:
            letters.append('-')
        return letters

    def guess_letter(self, letter):
        if letter not in self.guessed_letters:
            guess_wrong = True
            self.guessed_letters.append(letter)
            for i in range(len(self.secret_word)):
                if letter == self.secret_word[i]:
                    guess_wrong = False
                    self.display_letters[i] = letter
            if guess_wrong:
                self.guesses += 1

    def check_win(self):
        word = ''.join(self.display_letters)
        if word == self.secret_word and self.guesses  self.allowed_guesses

Our hangman program needs to hold data and have functions that operate on the data. This suggests that we should use Object Orientated Programming (OOP). Let’s begin by pointing out the data Hangman needs to keep track of first.

  • wins
  • secret word
  • display letters
  • guessed_letters
  • guesses
  • allowed guesses

Here is a list of behaviors that Hangman needs to perform to work on the data.

  • __init__
  • start_game
  • read_word_file
  • pick_secret_word
  • create_display_letters
  • guess_letter
  • check_win
  • check_lose

Let’s take each function one at a time…

__init__

__init__ is a function that all Python classes have that is used to initalize an object. Programmers from other OOP languages such as Java or C++ may refer to this as a constructor method.

Here is our __init__ code

def __init__(self, word_list_file, allowed_guesses=15):
    self.words = self.read_word_file(word_list_file)
    self.allowed_guesses = allowed_guesses
    self.start_game()
    self.wins = 0

You will notice that our __init__ function requires a word_list_file which is the path to a file that contains our list of words. The first thing this function does is reads the words_list_file using the read_word_file function. That function returns all of the words in the file as a list. One the next line, we set the self.allowed_guesses variable to the supplied allowed_guesses parameter. Then we call self.start_game() to initialize the game.

start_game

start_game initializes our hangman game. The reason this function is seperate from __init__ is so that clients can start a new game of hangman by calling this method, rather than recreating a new Hangman object. Here is the code for the start_game fucntion.

def start_game(self):
    self.secret_word = self.pick_secret_word()
    self.display_letters = self.create_display_letters()
    self.guessed_letters = []
    self.guesses = 0

Mostly speaking, we are just initializing our class variables in this function. The first thing we do is pick a secret word. We use self.pick_secret_word() which randomly picks a word from our word list and returns it. Next we need to create a list that holds the user’s correct guesses. At first, we want it to contain only dash (‘-‘) characters, so we use self.create_display_letters to build that list and return it to this function.

Our next line creates an empty list to hold the user’s guesses followed by a line to set their incorrect guesses to zero.

read_word_file

We met read_word_file in __init__. Now let’s talk about how it works. Here is the code.

@staticmethod
def read_word_file(word_list_file):
    word_list = []
    with open(word_list_file, 'r') as f:
        for line in f:
            word_list.append(line.rstrip())
    return word_list

This method is decorated with @staticmethod which indicate the method belongs to the class Hangman rather than individual Hangman objects. The first thing we do is create an empty word_list object that holds our words. The next thing we do is open word_list_file in read mode using the statement with open (word_list_file, 'r') as f. That statement opens the file and assigns it the variable f. It will also handle closing the file when we are done.

Now we need to read the file line by line. We do that with the for loop. As we go through each line in the file, we need to strip off any trailing ‘\n’ characters, which what line.rstrip() does. At this point, we can add our word to the word_list. When we are done reading the file, we can return the word_list to the calling method.

pick_secret_word

We met pick_secret_word in the start_game function. Here is the code for this method followed by an explanation.

def pick_secret_word(self):
    index = randint(0, len(self.words) - 1)
    return self.words[index].upper()

(note: see Random Int—Python for a post dedicated to picking random items from a list)

In this code, we need to pick a random number between 0 and the number of words – 1. We need to use -1 because lists are zero based. Once we have a number, we return a secret word from the words list and convert it to an upper cased string for easy comparisons later on in the program.

create_display_letters

Now that we have picked our secret word, we can use create_display_letters to assign dash (‘-‘) characters for each unknown letter in the game. Latter on, we will replace the dashes with correct guesses. Here is the code for create_display_letters.

def create_display_letters(self):
    letters = []
    for _ in self.secret_word:
        letters.append('-')
    return letters

In this function, we create a letters list object that is empty. Then we go through each letter in self.secret_word. We use the underscore (‘_’) to indicate that we aren’t actually interested in each letter so there is no need to assign to a variable. At each iteration of the loop, we just append a dash to the letters list. When this method returns, we have a list that is the same length as secret word but it is filled with dashes.

guess_letter

This function is the main entry point for clients that use this class. The idea here is that the client get’s the user’s guess from some sort of input (note that this class isn’t concerned with how that input is gathered from the user) and the guess is passed to this guess_letter function. Here is the code followed by an explanation.

def guess_letter(self, letter):
    if letter not in self.guessed_letters:
        guess_wrong = True
        self.guessed_letters.append(letter)
        for i in range(len(self.secret_word)):
            if letter == self.secret_word[i]:
                guess_wrong = False
                self.display_letters[i] = letter
        if guess_wrong:
            self.guesses += 1

Again, this begins with a letter variable that is supplied by the caller. We don’t care at this point how the program got the letter from the user. Now, first we need to check that that the letter wasn’t already guessed. If it was, we just ignore the guess.

Now, we are creating a boolean variable that is set to True to assume that they guessed wrong. The next line adds the guess to the guessed_letters list. Next, we are going to go through self.secret_word one letter at a time using indexes.

Inside of the loop, we check if the guessed letter matches the current letter in self.secret_word at index ‘i’. If we have a match, we set gress_wrong to False, and we replace the dash character in self.display_letters at index to the letter.

Finally, we check if they have guessed right or wrong. If guess_wrong is True, we update the self.guesses by 1 to indicate that they have guessed wrong.

check_win

The client of this class needs a way to check if the user won the game. We use the check_win function as a way to report back to the client if the user has won the game. Here’s the code followed by an explanation.

def check_win(self):
    word = ''.join(self.display_letters)
    if word == self.secret_word and self.guesses <= self.allowed_guesses:
        self.wins += 1
        return True
    else:
        return False

What we are doing here is assembling the user's guesses into a single string using ''.join(self.display_letters. The string will end up being something like ‘K-tt-es’ if they haven’t guessed all of the letters in the word yet, but if they have guessed everything right, it would be ‘Kitties’.

The next thing to do is see if word is equal to self.secret_word. As long as they match and the user hasn’t exceeded the number of allowed guesses, they win the game. We increment self.wins by 1 and return True. Alternatively, we return False to indicate they have not one the game.

check_lose

Our final function in Hangman is check_lose. This just checks if they have lost the game by exceeding the number of allowed incorrect guesses.

def check_lose(self):
    return self.guesses > self.allowed_guesses

Conclusion

The Hangman class demonstrates many important application concepts in Python. It opens files, picks numbers randomly, and tracks the progress of a game. An extremely important concept is that this class is not tied to any user interface. Instead, it contains the application logic used to play a game of hangman, but allows client modules to import it and use it as needed. The next part of this tutorial will focus on a GUI client that uses this class.

Random Int—Python

There are many applications in programming where we have to randomly pick an element in a list. Python has the random module which includes a randint function for this exact purpose. Here’s an example.

from random import randint

if __name__ == '__main__':
    names = ['Bob Belcher',
             'Linda Belcher',
             'Gene Belcher',
             'Tina Belcher',
             'Lousie Belcher']
    num = randint(0, len(names) - 1) # -1 because lists are 0 based
    print('Random number was', num)
    print('Name picked randomly is', names[num])

When run, this code produces the following output (which is different each time the script is ran).

Random number was 4
Name picked randomly is Lousie Belcher

Insertion Sort—Python

Insertion sorts are a common sorting technique that many computer science students are asked to learn. Here is a Python implementation of an Insertion Sort.

def insertion_sort(items):
    for i in range(2, len(items) - 1):
        item = items[i]
        j = i
        while (items[j - 1] > item) and (j >= 1):
            items[j] = items[j - 1]
            j -= 1
        items[j] = item

if __name__ == '__main__':
    items = ['Bob Belcher', 'Linda Belcher', 'Tina Belcher', 'Gene Belcher', 'Louise Belcher']
    print(items, '\n')

    print('Sorting...')
    insertion_sort(items)
    print(items)

Insertion sorts use nested loops and test if an item at the end of the list is less than an item in the front of the list. If they are, the code does a swap.

When run, we get this output:

['Bob Belcher', 'Linda Belcher', 'Tina Belcher', 'Gene Belcher', 'Louise Belcher'] 

Sorting...
['Bob Belcher', 'Gene Belcher', 'Linda Belcher', 'Tina Belcher', 'Louise Belcher']

Quick Sort—Python

Quick sort is a sorting algorithm that uses recursion and nested loops to sort items. Here is an implementation in Python

def split_list(unsorted, low, high):
    # Set our temp item at the low end
    item = unsorted[low]

    # Variables for tracking left and right
    # side of the list
    left = low
    right = high

    # loop until our left side is less than right side
    while left < right:

        # Move left to the right while it's less than item
        while unsorted[left] <= item and left  item:
            right -= 1

        # Check if we need to swap elements
        if left  low:
        # Split unsorted into two lists
        index = split_list(unsorted, low, high)

        # Sort the left hand of the list using recursion
        quick_sort(unsorted, low, index - 1)

        # Sort the right hand of the list using recursion
        quick_sort(unsorted, index + 1, high)


if __name__ == '__main__':
    items = ['Bob Belcher', 'Linda Belcher', 'Tina Belcher', 'Gene Belcher', 'Louise Belcher']
    print(items, '\n')

    print('Sorting...')
    quick_sort(items, 0, len(items) - 1)
    print(items)

When run, this code will produce the following output

['Bob Belcher', 'Linda Belcher', 'Tina Belcher', 'Gene Belcher', 'Louise Belcher'] 

Sorting...
['Bob Belcher', 'Gene Belcher', 'Linda Belcher', 'Louise Belcher', 'Tina Belcher']

The key in this algorithm is that we split our list into two halfs and then use recursion to sort each half. The work of swapping elements takes place in the split_list function. However, the quick_sort function is responsible for calling split_list until all items are sorted.

Selection Sort—Python

Selection sorts are a very common method of sorting. Here is a selection sort that is implemented in Python.

def selection_sort(items):
    for i in range(len(items) - 1):
        # Assume that the smallest item is located at index i
        smallest = i

        # Now loop through the rest of the list
        for j in range(i + 1, len(items)):
            # Is our item at index j smaller than our smallest item?
            if items[j] < items[smallest]:
                smallest = j

        #  Now swap elements to perform the sort
        temp = items[smallest]
        items[smallest] = items[i]
        items[i] = temp

if __name__ == '__main__':
    items = ['Bob Belcher', 'Linda Belcher', 'Gene Belcher', 'Tina Belcher', 'Louise Belcher']
    print(items, '\n')

    print('Sorting...')
    selection_sort(items)
    print(items)

Selection sorts use nested loops to iterate over a list. We check if the item at index j is less than the current smallest item. If j is smaller than smaller, we assign smaller to j.

Once we complete the nested loop, we can perform a swap. Our driver program demonstrates this with strings, but thanks to Python's duck typing system, this will sort any object that implements __lt__.

When run, we get this output

['Bob Belcher', 'Linda Belcher', 'Gene Belcher', 'Tina Belcher', 'Louise Belcher'] 

Sorting...
['Bob Belcher', 'Gene Belcher', 'Linda Belcher', 'Louise Belcher', 'Tina Belcher']

Continue—Python

The continue statement is used in Python to return program execution to the beginning of a loop. For a review of loops see for loops and while loops.

Let’s begin with a code example

names = ['Bob Belcher',
         'Linda Belcher',
         None,
         'Louise Belcher',
         'Tina Belcher',
         None,
         'Gene Belcher']

bob = ''
for name in names:
    if name is None:
        continue    # Go back to the top of the loop since
                    # since we can't do comparisons on None
    if 'Bob' in name:
        bob = name

In this situation, we have a list object that has a combination of Strings and Python’s None object. What we are doing is trying to find ‘Bob’ but to do that, we need a way to skip over the None objects or our program will crash. Lines 11 and 12 in the above code snippet do the job of checking if the elemnt name is None first. If it turns out that the element is None, line 12 uses the continue statement to return the execution to the top of the loop.

The continue keyword is useful when we process a loop of mixed types. Let’s take another example of where the keyword is also useful.

while True:
    fileName = input('Enter a file name => ')
    try:
        lines = open(fileName, 'r').readlines()
    except FileNotFoundError:
        print('Try a different file')
        continue # We can't do the next part because
                 # couldn't open the file
    for line in lines:
        print(line)

This code snippet asks the user for a file and then attempts to open the file for processing. However, if for some reason we can’t open the file, the program won’t be able to process lines 9 and 10. For this reason, we use the continue keyword to return program execution to the top of the loop and give the user an opportunity to open a different file.

Pass—Python

Python has a special pass keyword to do nothing. Here’s a code example

countdown = 15
while countdown > 0:
    if countdown > 10:
        pass # Don't do anything yet
    else:
        print('T - ', str(countdown))
    countdown -= 1
else:
    print ('We have liftoff!')

This code simulates a countdown, but we don’t actually want to print anything to the console until we get to 10. In this case, we set up an if condition that checks if countdown is greater than 10. If countdown is greater than 10, we use pass to do nothing.

In the real world, I tend to use pass when I am developing. Here is an example

def onNew():
    #TODO: Handle new file here
    pass

def onSave():
    #TODO: Handle saving a file here
    pass

def onOpen():
    #TODO: Handle opening a file here
    pass

def onError():
    #TODO: Handle user input errors here
    pass

repeat = True
while repeat:
    print('1) New...')
    print('2) Open...')
    print('3) Save...')
    print('4) Quit...')

    choice = input('Enter an option => ')
    if choice == 1:
        onNew()
    elif choice == 2:
        onOpen()
    elif choice == 3:
        onSave()
    elif choice == 4:
        repeat = False
    else:
        onError()

In this programming example, I’m in the process of developing a menu drive user interface. You can see the menu printed out in the while loop. The user is asked for a choice and then if/elif statements are used to respond to their choice. In each choice except 4, we are using function to handle the user’s choice. This keeps the user reponse code seperate from the user menu code (concept know as seperations of concerns).

Above the menu loop there are four functions: onNew(), onOpen(), onSave(), and onError(). Every single one of these functions has the pass keyword. Eventually the pass statements will get replaced with actual code to handle each event, but for now, I only want to test the menu code. Using pass in this fashion lets me run the program and make sure the menu is working properly before I continue developing the rest of the program.