Python Advanced Quit Button

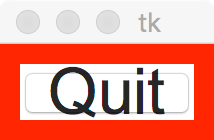
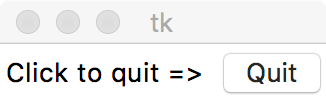
Object orientated programming fits extremely well with GUI programming. Using OOP, we can easily make reusable GUI components. This post shows off a quit button that confirms if the user really wants to exit the application. I got the idea from Programming Python: Powerful Object-Oriented Programming. Here is my implementation of the idea followed by the explanation.

from tkinter import *
from tkinter.messagebox import *


class TkQuitButton(Frame):
    def __init__(self, master=None,
                 auto_pack=True,  # Pack the widget automatically?
                 dialog_title='Confirm',  # Title text for the askyesno dialog
                 dialog_message='Are you sure you want to quit?',  # Message for the askyesno dialog
                 button_text='Quit',  # The quit button's text
                 quit_command=Frame.quit,  # Callback command for when the user wants to quit
                 cnf={}, **kw):

        super().__init__(master, cnf, **kw)
        # Store our fields for later user
        self.quit_command = quit_command
        self.dialog_message = dialog_message
        self.dialog_title = dialog_title
        self.quit_button = Button(self, text=button_text, command=self.quit)

        # Notice that self.quit_button is exposed. This can be useful for when
        # the client code needs to configure this frame on its own
        if auto_pack:
            self.pack_widget()
    
    # This let's us override the packing        
    def pack_widget(self):
        self.pack()
        self.quit_button.pack(side=LEFT, expand=YES, fill=BOTH)

    def quit(self):
        # Call the askyesno dialog
        result = askyesno(self.dialog_title, self.dialog_message)
        if result:
            # if they quit, then execute the stored callback command
            self.quit_command(self)


if __name__ == '__main__':
    TkQuitButton().mainloop()

This class extends the Frame class and packs a button into the frame. There are a few configuration properties that can be passed into the constructor. For example, we can auto_pack the widget so that it uses a default packing scheme. We can specifiy a custom title for the askyesno dialog as well as a custom message. The code even lets use customize the text of the button. We can also use a custom quit handler function should we choose to do so.

We can customize how the widget is packed in two different ways. The first way to access the quit_button property and call pack on it directly. This allows client code to change how this widget is packed into their GUIs. Alternatively, we can subclass this class and just override the pack_widget method.

The default quit implementation uses Tk’s askyesno dialog function to display a confirmation dialog to the user. It’s title and message are set to self.dialog_title and self.dialog_message properties. This allows use to customize what the user sees when the dialog is displayed. If the user presses yes, then we call the self.quit_command function which defaults to Frame.quit. Note that since self.quit is a method, we can customize this behavior by overriding it. Since we use a callback handler to exit the applicaiton, we can also customize how the application exits as well.

Advertisement

Tk Standard Dialogs

Applications generally need to show system dialogs to alert the user to events. In this post, we will cover the yes or no dialog, a warning dialog, information dialog, and an error dialog. Tk uses system calls to show dialogs that are native to the underlying platform. Therefore, dialogs on Windows will look like they should on Windows while Mac OS X dialogs will appear correct for that platform.

askyesno

The askyesno is a dialog that is used to present a user with a yes or no choice. It returns a boolean to the caller.

result = askyesno('Yes No Demo', 'Click on either yes or no')

yesno

showwarning

You use showwarning when you want to warn the user about something.

showwarning('Warning Demo', 'You have been warned')

warning

showinfo

This dialog is used to supply the user with information.

showinfo('Info Demo', 'This is some information')

info

showerror

You should use showerror when you need to report an error to the user.

showerror('Error Demo', 'This is an error')

error

Putting it Together

Standard dialog calls are a useful way to notify the user about something important. Since they block the program’s execution, the user is forced to interact with the dialog. This makes the dialogs ideal for forcing the user to read a message or make a choice. Below is a complete program that demonstrates all of the dialogs.

from tkinter import *
from tkinter.messagebox import *


def ask_yes_no_demo():
    result = askyesno('Yes No Demo', 'Click on either yes or no')
    if result:
        showinfo('Result', 'You clicked on Yes')
    else:
        showinfo('Result', 'You clicked on No')


def warning_demo():
    showwarning('Warning Demo', 'You have been warned')


def info_demo():
    showinfo('Info Demo', 'This is some information')


def error_demo():
    showerror('Error Demo', 'This is an error')


root = Tk()
Button(text='Ask Yes No', command=ask_yes_no_demo).pack(fill=X)
Button(text='Warning', command=warning_demo).pack(fill=X)
Button(text='Info', command=info_demo).pack(fill=X)
Button(text='Error', command=error_demo).pack(fill=X)
Button(text='Quit', command=(lambda: sys.exit(0))).pack(fill=X)
mainloop()

Tk — Toplevel

Toplevel widgets are non-root windows. In other words, Toplevel widgets are windows that appear outside of the application’s root window. We can use Toplevel widgets for items such as dialogs, color picker windows, or even dragging tabs into windows. Basically, anytime you need a window that isn’t part of the main application, you can use a Toplevel to create it.

Here is an example of a script that creates Toplevel windows everytime the Spawn button is clicked.

from tkinter import *

count = 0


def spawn_top_level(text):
    global count

    # Create a new window with a label
    win = Toplevel()
    Label(win, text=text, font=('Arial', 32, 'italic')).pack(expand=YES, fill=BOTH)

    count += 1


# This is the main application window
root = Tk()
Button(root,
       text='Spawn',
       command=(lambda: spawn_top_level('Top Level: {}'.format(count)))).pack()
Button(root, text='Quit', command=root.quit).pack()
root.mainloop()

The code creates Toplevel windows inside of the spawn_top_level() function. The window itself is created on line 10, and then we attach a Label to it on line 11. Notice how we pass win as the Label’s parent on line 11. This is how Tkinter knows where to attach the label. When the script is run, we get something like the screenshot below.

toplevel

Tk – GUI Composition with Classes

Since Python’s Tk widgets are classes, it is really easy to compose GUIs by using Pythons OOP capabilities. OOP works really well because we can break complex GUIs down into smaller components and then compose a larger GUI out of these components. Let’s begin with a text area control.

from tkinter import *


class TextArea(Text):
    def __init__(self, parent=None):
        Text.__init__(self, parent, width=40, height=10, border=2)
        self.pack(expand=YES, fill=BOTH, side=TOP)

if __name__ == '__main__':
    TextArea(Toplevel())
    mainloop()

This code subclasses the Text control and initializes it to what would be a reasonably sized text area control that grows and shrinks with the window. We can verify if our control is working properly by using the self-test code found in the script. Here is a screenshot of what it looks like.

textarea

It’s not much of a window, but we aren’t done composing our GUI yet either. Now let’s make some buttons that will let us load, save, and quit the application. The buttons will be arranged horizontally from left to right. This time, we are going to subclass the Frame class.

class ControlPanel(Frame):
    def __init__(self, parent=None, save=None, load=None, quit_command=exit):
        Frame.__init__(self, parent)
        Button(self, text='Save', command=save).pack(side=LEFT)
        Button(self, text='Load', command=load).pack(side=LEFT)
        Button(self, text='Exit', command=quit_command).pack(side=LEFT)
        self.pack(expand=YES, fill=BOTH, side=TOP)

if __name__ == '__main__':
    ControlPanel(Toplevel())
    mainloop()

In this example, we are using the self variable as a parent object to our 3 objects. The ControlPanel’s constructor accepts three references to functions that act as event handlers for the buttons. Inside of the constructor, we create three buttons and set their text and command attributes. Then we pack them to the left side of the layout. Finally, the frame itself is packed. Running the self-test code gives us the following window.

control_panel

The final task is to combine our controls into a single window. Once again, we are going to subclass Frame.

class TextPanel(Frame):
    def __init__(self, parent=None):
        Frame.__init__(self, parent)
        TextArea(self)
        ControlPanel(self)
        self.pack(expand=YES, fill=BOTH)

if __name__ == '__main__':
    TextPanel(Toplevel())
    mainloop()

Notice how the TextPanel class simply uses TextArea and ControlPanel. Once again, we are using composition to build up a complex GUI. The beauty of this pattern is that we can use both TextArea and ControlPanel in other GUIs. Futhermore, the TextPanel class can also get embedded into other GUIs as well.

Since all three classes have test code, we can easily see how our code is working as we develop. This is part of the reason why it’s so easy to build up GUI applications in Python using Tk or another widget toolkit. We can easily contruct GUIs using OOP and then test then instantly and independently of the application.

Here is the finished GUI followed by a complete script.

complete

from tkinter import *


class TextArea(Text):
    def __init__(self, parent=None):
        Text.__init__(self, parent, width=40, height=10, border=2)
        self.pack(expand=YES, fill=BOTH, side=TOP)


class ControlPanel(Frame):
    def __init__(self, parent=None, save=None, load=None, quit_command=exit):
        Frame.__init__(self, parent)
        Button(self, text='Save', command=save).pack(side=LEFT)
        Button(self, text='Load', command=load).pack(side=LEFT)
        Button(self, text='Exit', command=quit_command).pack(side=LEFT)
        self.pack(expand=YES, fill=BOTH, side=TOP)


class TextPanel(Frame):
    def __init__(self, parent=None):
        Frame.__init__(self, parent)
        TextArea(self)
        ControlPanel(self)
        self.pack(expand=YES, fill=BOTH)


if __name__ == '__main__':
    TextArea(Toplevel())
    ControlPanel(Toplevel())
    TextPanel(Toplevel())
    mainloop()

Tk – Themed Widgets

Since Python Tk widgets are classes, we can use inheritance to specialize widgets for our applications. A common use case is specifying themes for our widgets so that our GUI controls look consistent. In this tutorial, I’ll explain how to make themed Tk widgets.

themed_buttons.py

from tkinter import *


class ThemedFrame(Frame):
    def __init__(self, parent=None, **configs):
        Frame.__init__(self, parent, **configs)
        self.config(bg='Red', borderwidth=10)
        self.pack(expand=YES, fill=BOTH)


class ThemedButton(Button):
    def __init__(self, parent=None, **configs):
        Button.__init__(self, parent, **configs)
        self.config(font=('Arial', 32))
        self.pack()


if __name__ == '__main__':
    frame = ThemedFrame()
    ThemedButton(frame, text='Quit', command=(lambda: sys.exit()))
    frame.mainloop()

The above code makes the following window. The background is red and the button has its font set to Arial 32. All of the ThemedButtons and ThemedFrames in this application will adhere to a consistent styling.

themed_widgets

Making the ThemedFrame and ThemedButton are fairly straightforward. For ThemedFrame, we create a ThemedFrame class and have it extend Frame. Line 6 calls the Frame’s __init__ method and then we start our custom configuration on line 7. In this case, we set the frame’s background to red and give it a border that is 10 pixels thick. Then we pack the frame and set it’s expand and fill options so that the frame always resizes with the window.

ThemedButton follows the same pattern as ThemedFrame. The ThemedButton class extends Button. On line 12, we call Button’s __init__ method followed by configuration options on line 14. In this case, we set the button’s font to Arial 32. Then we call the pack() method.

The demonstration part is found on lines 18-21. We create a ThemedFrame object on line 19. It’s made the same way as a regular Frame. Line 20 makes a ThemedButton. The constructor is consistent with Button’s constructor, so we are free to pass attributes such as the text and callback handlers to the button. Finally, we call mainloop() on ThemedFrame. All of this works because ThemedButton and ThemedFrame are simply specialization of their parent classes.

Tk Event Handling

All GUI programs need a way to respond to user interactions. The Tk GUI toolkit provided in Python provides us with a number of different ways to respond to user interactions. Let’s look at a few different ways we can make buttons respond to user events.

Pass a Function

Since Python considers functions to be objects, we can just pass a function to the event handler.

def click():
    print('Clicked')

root = Tk()
Button(root, text='Click Me', command=click).pack()
root.mainloop()

Use a Lambda

Lamdas are another popular way to express event handling code.

root = Tk()
Button(root, text='Click Me', command=(lambda: print('Clicked'))).pack()
root.mainloop()

Use a Class

Many programs construct GUIs using Pythons OOP capabilities. As such, we can bind a class method to the event handler also.

class MyClass:
    def __init__(self, root):
        self.button = Button(root, text='Class', command=self.command).pack()

    def command(self):
        print('Class handler')

root = Tk()
MyClass(root)
root.mainloop()

Override the __call__ method

We can also construct classes that overload the __call__ operator. Doing so is useful when we need to pass complex information along to an event handler.

class MyCallable:
    def __init__(self):
        self.message = '__call__ handler'

    def __call__(self):
        print(self.message)

root=Tk()
Button(root, text='Callable', command=MyCallable()).pack()
root.mainloop()

Event Binding

We can also make direct calls to Tk

def print_me():
    print('binding')

root = Tk()

w = Button(root, text='Binding')
w.pack()
w.bind('<Button-1>, print_me)
root.mainloop()

Complete Program

Below is a complete program that demonstrates all of the above patterns.

import sys
from tkinter import *


def write():
    print('Function call')


class HelloClass:
    def __init__(self, root):
        self.button = Button(root, text='Class', command=self.command).pack(side=LEFT, fill=X)

    def command(self):
        print('Class handler')


class Callable:
    def __init__(self):
        self.message = '__call__ handler'

    def __call__(self):
        print(self.message)


def printMe(event):
    print('Double click to quit')


def quit(event):
    sys.exit()


if __name__ == '__main__':
    root = Tk()

    Button(root, text='Function', command=write).pack(side=LEFT, fill=X)
    Button(root, text='Lambda', command=(lambda: print('Labmda call'))).pack(side=LEFT, fill=X)
    HelloClass(root)
    Button(root, text='Callable', command=Callable()).pack(side=LEFT, fill=X)

    w = Button(root, text='Binding')
    w.pack(side=LEFT, fill=X)
    w.bind('<Button-1>', printMe)
    w.bind('<Double-1>', quit)

    root.mainloop()

Python – Getting Started With TK

Python has a variety of widget libraries, but TK is the one included in CPython. This post shows a very basic Python program that uses TK to create an application window with a label and a button. The application closes when the user clicks on the button.

from tkinter import *

root = Tk()

Label(root, text='Click to quit => ').pack(side=LEFT, expand=YES, fill=BOTH)
Button(root, text='Quit', command=sys.exit).pack(side=LEFT, expand=YES, fill=BOTH)

root.mainloop()

The following window appears when the application is executed.
tk

Explanation

The program starts by importing the tkinter module on line 1. This module contains the widgets (or controls) that we need to create our application window. On line 3, we create a root variable and assign it to a main (or root) window by calling the Tk() function. We are now ready to start creating our controls.

Line 5 creates a Label control. The first argument in the constructor is its parent window, so we pass in root. The text argument assigns text to the label. Next, we call the pack() method on the control. In our case, we use three optional arguments. Side is used to tell the layout manager which side the control should stick too. In our case, we want to left aling our controls so we use LEFT. The expand parameter tells the label to expand with the window, while the fill control tells the control which directions it should expand or shrink (horizontal, vertical, or both).

Line 6 creates a Button that we can click on. The root is still the main window while the text is the button’s text. The command is the action the button should execute when clicked. In our case, we are telling the application to exit because we are passing the sys.exit function to the command argument. The pack() method does the same as the Label on line 5.

Finally, we want to show the window and make the program wait for events. We do this by calling root.mainloop(). Once mainloop() executes, the script will only respond to code found in event handlers, which is command=sys.exit in our case.

%d bloggers like this: