Python File Dialog

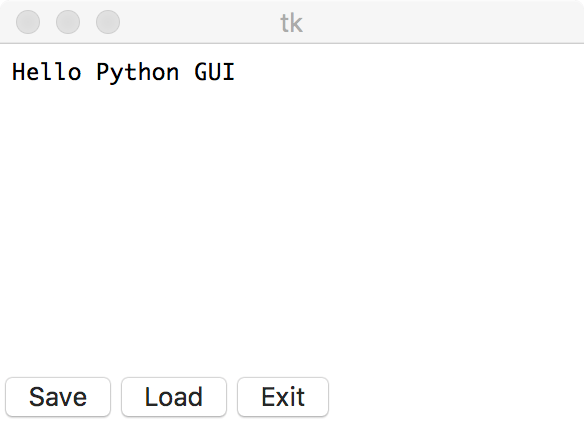
Many Python applications need to ask the user if they want to a open a file or folder or save a file. The tkinter library has built in dialog functions for this exact purpose. Here is an example of how to use the askopenfilename, asksaveasfile, and askdirectory functions with some common configurations.

from tkinter import *
from pathlib import Path
from tkinter.filedialog import askopenfilename, asksaveasfile, askdirectory


class Window(Frame):
    def __init__(self, master=None, cnf={}, **kw):
        super().__init__(master, cnf, **kw)
        self.open = Button(self, text='Open', command=self.open_file)
        self.save = Button(self, text='Save', command=self.save_file)
        self.ask_dir = Button(self, text='Folder', command=self.ask_folder)
        self.exit = Button(self, text='Exit', command=self.quit)

        for b in (self.open, self.save, self.ask_dir, self.exit):
            b.pack(side=LEFT, fill=BOTH)

        self.pack()


    def open_file(self):
        file = askopenfilename(filetypes=(("Python files", "*.py"),
                                           ("All files", "*.*")),
                               title='Open File',
                               initialdir=str(Path.home()))
        if file:
            print(file)
        else:
            print('Cancelled')

    def save_file(self):
        file = asksaveasfile(filetypes=(("Python files", "*.py"),
                                           ("All files", "*.*")),
                               title='Save File',
                               initialdir=str(Path.home()))
        if file:
            print(file)
        else:
            print('Cancelled')

    def ask_folder(self):
        folder = askdirectory(title='Pick a folder', initialdir=str(Path.home()))

        if folder:
            print(folder)
        else:
            print('Cancelled')


if __name__ == '__main__':
    win = Window(Tk())
    win.mainloop()

askopenfilename

You use askopenfilename when you want to open a file. It will return the absolute path of the file as a string if the user picks a file, or it will return None if the user cancels. You can restict the file types by passing an Iterable of tuples to the filetypes argument. If you do not specify an initialdir argument, it will default to the root of the user’s disk. I usually prefer to set it to the user’s home directory using Path.home() but you can adjust this to your application’s needs. The dialog will look specific to the user’s platform.

def open_file(self):
    file = askopenfilename(filetypes=(("Python files", "*.py"),
                                       ("All files", "*.*")),
                           title='Open File',
                           initialdir=str(Path.home())
    if file:
        print(file)
    else:
        print('Cancelled')

asksaveasfile

You can use this dialog when you want to perform a save operation. It takes arguments that are similar to askopenfilename, but it will return a file handler object opened in write mode (if you use the default arguments) rather than a string. You can then proceed with your save code. This function also returns None if the user cancels.

def save_file(self):
    file = asksaveasfile(filetypes=(("Python files", "*.py"),
                                       ("All files", "*.*")),
                         title='Save File',
                         initialdir=str(Path.home()))
    if file:
        print(file)
    else:
        print('Cancelled')

askdirectory

This function is used to let the user pick a folder. It will return a string if the user picked a folder or None if they chose to cancel.

def ask_folder(self):
    folder = askdirectory(title='Pick a folder', initialdir=str(Path.home()))

    if folder:
        print(folder)
    else:
        print('Cancelled')

Python Simple Dialogs

Applications typically have to request input from the user from time to time. Python and tkinter have built in dialogs that help you ask the user basic questions. These dialogs also provide validation to help make sure that the user enters valid input. This is an example program that shows off askquestion, askfloat, askinteger, and askstring.

from tkinter import *
from tkinter.messagebox import askquestion, showinfo
from tkinter.simpledialog import askfloat, askinteger, askstring


class AskDialogDemo(Frame):
    def __init__(self, master=None, cnf={}, **kw):
        super().__init__(master, cnf, **kw)
        self.pack()
        Button(self, text='Ask a Question', command=self.askquestion_demo).pack(side=LEFT, fill=BOTH, expand=YES)
        Button(self, text='Ask for a Float', command=self.askfloat_demo).pack(side=LEFT, fill=BOTH, expand=YES)
        Button(self, text='Ask for an Integer', command=self.askinteger_demo).pack(side=LEFT, fill=BOTH, expand=YES)
        Button(self, text='Ask for a String', command=self.askstring_demo).pack(side=LEFT, fill=BOTH, expand=YES)

    def askquestion_demo(self):
        answer = askquestion('Question', 'Do you like corn?')
        if answer:
            showinfo('Answer', answer)
        else:
            self.canceled()

    def askfloat_demo(self):
        num = askfloat('Float', 'Enter a decimal number')
        if num:
            showinfo('Float', 'You entered {}'.format(num))
        else:
            self.canceled()

    def askinteger_demo(self):
        num = askinteger('Integer', 'Enter a whole number')
        if num:
            showinfo('Integer', 'You entered {}'.format(num))
        else:
            self.canceled()

    def askstring_demo(self):
        str = askstring('String', 'Enter a string')
        if str:
            showinfo('String', 'You entered {}'.format(str))
        else:
            self.canceled()

    def canceled(self):
        showinfo('Canceled', 'You canceled')


if __name__ == '__main__':
    AskDialogDemo().mainloop()

Explanation

askquestion

You use askquestion to ask the user a basic yes or no question. It takes two arguments: one for the title, and the other is for the question. The returned value will be a string containing yes or no.

answer = askquestion('Question', 'Do you like corn?')

askfloat

The askfloat function returns decimal numbers. It will also perform validation that makes sure the user enters a valid float. The function will either return the float that the user entered or it will return None if they hit cancel.

num = askfloat('Float', 'Enter a decimal number')

askinteger

This function works like askfloat but it returns integers.

num = askinteger('Integer', 'Enter a whole number')

askstring

You can use askstring to get a string value from the user. It will return None if the user enters a blank string and hits Ok or Cancel.

str = askstring('String', 'Enter a string')

Python Advanced Quit Button

Object orientated programming fits extremely well with GUI programming. Using OOP, we can easily make reusable GUI components. This post shows off a quit button that confirms if the user really wants to exit the application. I got the idea from Programming Python: Powerful Object-Oriented Programming. Here is my implementation of the idea followed by the explanation.

from tkinter import *
from tkinter.messagebox import *


class TkQuitButton(Frame):
    def __init__(self, master=None,
                 auto_pack=True,  # Pack the widget automatically?
                 dialog_title='Confirm',  # Title text for the askyesno dialog
                 dialog_message='Are you sure you want to quit?',  # Message for the askyesno dialog
                 button_text='Quit',  # The quit button's text
                 quit_command=Frame.quit,  # Callback command for when the user wants to quit
                 cnf={}, **kw):

        super().__init__(master, cnf, **kw)
        # Store our fields for later user
        self.quit_command = quit_command
        self.dialog_message = dialog_message
        self.dialog_title = dialog_title
        self.quit_button = Button(self, text=button_text, command=self.quit)

        # Notice that self.quit_button is exposed. This can be useful for when
        # the client code needs to configure this frame on its own
        if auto_pack:
            self.pack_widget()
    
    # This let's us override the packing        
    def pack_widget(self):
        self.pack()
        self.quit_button.pack(side=LEFT, expand=YES, fill=BOTH)

    def quit(self):
        # Call the askyesno dialog
        result = askyesno(self.dialog_title, self.dialog_message)
        if result:
            # if they quit, then execute the stored callback command
            self.quit_command(self)


if __name__ == '__main__':
    TkQuitButton().mainloop()

This class extends the Frame class and packs a button into the frame. There are a few configuration properties that can be passed into the constructor. For example, we can auto_pack the widget so that it uses a default packing scheme. We can specifiy a custom title for the askyesno dialog as well as a custom message. The code even lets use customize the text of the button. We can also use a custom quit handler function should we choose to do so.

We can customize how the widget is packed in two different ways. The first way to access the quit_button property and call pack on it directly. This allows client code to change how this widget is packed into their GUIs. Alternatively, we can subclass this class and just override the pack_widget method.

The default quit implementation uses Tk’s askyesno dialog function to display a confirmation dialog to the user. It’s title and message are set to self.dialog_title and self.dialog_message properties. This allows use to customize what the user sees when the dialog is displayed. If the user presses yes, then we call the self.quit_command function which defaults to Frame.quit. Note that since self.quit is a method, we can customize this behavior by overriding it. Since we use a callback handler to exit the applicaiton, we can also customize how the application exits as well.

Tk Standard Dialogs

Applications generally need to show system dialogs to alert the user to events. In this post, we will cover the yes or no dialog, a warning dialog, information dialog, and an error dialog. Tk uses system calls to show dialogs that are native to the underlying platform. Therefore, dialogs on Windows will look like they should on Windows while Mac OS X dialogs will appear correct for that platform.

askyesno

The askyesno is a dialog that is used to present a user with a yes or no choice. It returns a boolean to the caller.

result = askyesno('Yes No Demo', 'Click on either yes or no')

yesno

showwarning

You use showwarning when you want to warn the user about something.

showwarning('Warning Demo', 'You have been warned')

warning

showinfo

This dialog is used to supply the user with information.

showinfo('Info Demo', 'This is some information')

info

showerror

You should use showerror when you need to report an error to the user.

showerror('Error Demo', 'This is an error')

error

Putting it Together

Standard dialog calls are a useful way to notify the user about something important. Since they block the program’s execution, the user is forced to interact with the dialog. This makes the dialogs ideal for forcing the user to read a message or make a choice. Below is a complete program that demonstrates all of the dialogs.

from tkinter import *
from tkinter.messagebox import *


def ask_yes_no_demo():
    result = askyesno('Yes No Demo', 'Click on either yes or no')
    if result:
        showinfo('Result', 'You clicked on Yes')
    else:
        showinfo('Result', 'You clicked on No')


def warning_demo():
    showwarning('Warning Demo', 'You have been warned')


def info_demo():
    showinfo('Info Demo', 'This is some information')


def error_demo():
    showerror('Error Demo', 'This is an error')


root = Tk()
Button(text='Ask Yes No', command=ask_yes_no_demo).pack(fill=X)
Button(text='Warning', command=warning_demo).pack(fill=X)
Button(text='Info', command=info_demo).pack(fill=X)
Button(text='Error', command=error_demo).pack(fill=X)
Button(text='Quit', command=(lambda: sys.exit(0))).pack(fill=X)
mainloop()

Tk — Toplevel

Toplevel widgets are non-root windows. In other words, Toplevel widgets are windows that appear outside of the application’s root window. We can use Toplevel widgets for items such as dialogs, color picker windows, or even dragging tabs into windows. Basically, anytime you need a window that isn’t part of the main application, you can use a Toplevel to create it.

Here is an example of a script that creates Toplevel windows everytime the Spawn button is clicked.

from tkinter import *

count = 0


def spawn_top_level(text):
    global count

    # Create a new window with a label
    win = Toplevel()
    Label(win, text=text, font=('Arial', 32, 'italic')).pack(expand=YES, fill=BOTH)

    count += 1


# This is the main application window
root = Tk()
Button(root,
       text='Spawn',
       command=(lambda: spawn_top_level('Top Level: {}'.format(count)))).pack()
Button(root, text='Quit', command=root.quit).pack()
root.mainloop()

The code creates Toplevel windows inside of the spawn_top_level() function. The window itself is created on line 10, and then we attach a Label to it on line 11. Notice how we pass win as the Label’s parent on line 11. This is how Tkinter knows where to attach the label. When the script is run, we get something like the screenshot below.

toplevel

Tk – GUI Composition with Classes

Since Python’s Tk widgets are classes, it is really easy to compose GUIs by using Pythons OOP capabilities. OOP works really well because we can break complex GUIs down into smaller components and then compose a larger GUI out of these components. Let’s begin with a text area control.

from tkinter import *


class TextArea(Text):
    def __init__(self, parent=None):
        Text.__init__(self, parent, width=40, height=10, border=2)
        self.pack(expand=YES, fill=BOTH, side=TOP)

if __name__ == '__main__':
    TextArea(Toplevel())
    mainloop()

This code subclasses the Text control and initializes it to what would be a reasonably sized text area control that grows and shrinks with the window. We can verify if our control is working properly by using the self-test code found in the script. Here is a screenshot of what it looks like.

textarea

It’s not much of a window, but we aren’t done composing our GUI yet either. Now let’s make some buttons that will let us load, save, and quit the application. The buttons will be arranged horizontally from left to right. This time, we are going to subclass the Frame class.

class ControlPanel(Frame):
    def __init__(self, parent=None, save=None, load=None, quit_command=exit):
        Frame.__init__(self, parent)
        Button(self, text='Save', command=save).pack(side=LEFT)
        Button(self, text='Load', command=load).pack(side=LEFT)
        Button(self, text='Exit', command=quit_command).pack(side=LEFT)
        self.pack(expand=YES, fill=BOTH, side=TOP)

if __name__ == '__main__':
    ControlPanel(Toplevel())
    mainloop()

In this example, we are using the self variable as a parent object to our 3 objects. The ControlPanel’s constructor accepts three references to functions that act as event handlers for the buttons. Inside of the constructor, we create three buttons and set their text and command attributes. Then we pack them to the left side of the layout. Finally, the frame itself is packed. Running the self-test code gives us the following window.

control_panel

The final task is to combine our controls into a single window. Once again, we are going to subclass Frame.

class TextPanel(Frame):
    def __init__(self, parent=None):
        Frame.__init__(self, parent)
        TextArea(self)
        ControlPanel(self)
        self.pack(expand=YES, fill=BOTH)

if __name__ == '__main__':
    TextPanel(Toplevel())
    mainloop()

Notice how the TextPanel class simply uses TextArea and ControlPanel. Once again, we are using composition to build up a complex GUI. The beauty of this pattern is that we can use both TextArea and ControlPanel in other GUIs. Futhermore, the TextPanel class can also get embedded into other GUIs as well.

Since all three classes have test code, we can easily see how our code is working as we develop. This is part of the reason why it’s so easy to build up GUI applications in Python using Tk or another widget toolkit. We can easily contruct GUIs using OOP and then test then instantly and independently of the application.

Here is the finished GUI followed by a complete script.

complete

from tkinter import *


class TextArea(Text):
    def __init__(self, parent=None):
        Text.__init__(self, parent, width=40, height=10, border=2)
        self.pack(expand=YES, fill=BOTH, side=TOP)


class ControlPanel(Frame):
    def __init__(self, parent=None, save=None, load=None, quit_command=exit):
        Frame.__init__(self, parent)
        Button(self, text='Save', command=save).pack(side=LEFT)
        Button(self, text='Load', command=load).pack(side=LEFT)
        Button(self, text='Exit', command=quit_command).pack(side=LEFT)
        self.pack(expand=YES, fill=BOTH, side=TOP)


class TextPanel(Frame):
    def __init__(self, parent=None):
        Frame.__init__(self, parent)
        TextArea(self)
        ControlPanel(self)
        self.pack(expand=YES, fill=BOTH)


if __name__ == '__main__':
    TextArea(Toplevel())
    ControlPanel(Toplevel())
    TextPanel(Toplevel())
    mainloop()

Tk – Themed Widgets

Since Python Tk widgets are classes, we can use inheritance to specialize widgets for our applications. A common use case is specifying themes for our widgets so that our GUI controls look consistent. In this tutorial, I’ll explain how to make themed Tk widgets.

themed_buttons.py

from tkinter import *


class ThemedFrame(Frame):
    def __init__(self, parent=None, **configs):
        Frame.__init__(self, parent, **configs)
        self.config(bg='Red', borderwidth=10)
        self.pack(expand=YES, fill=BOTH)


class ThemedButton(Button):
    def __init__(self, parent=None, **configs):
        Button.__init__(self, parent, **configs)
        self.config(font=('Arial', 32))
        self.pack()


if __name__ == '__main__':
    frame = ThemedFrame()
    ThemedButton(frame, text='Quit', command=(lambda: sys.exit()))
    frame.mainloop()

The above code makes the following window. The background is red and the button has its font set to Arial 32. All of the ThemedButtons and ThemedFrames in this application will adhere to a consistent styling.

themed_widgets

Making the ThemedFrame and ThemedButton are fairly straightforward. For ThemedFrame, we create a ThemedFrame class and have it extend Frame. Line 6 calls the Frame’s __init__ method and then we start our custom configuration on line 7. In this case, we set the frame’s background to red and give it a border that is 10 pixels thick. Then we pack the frame and set it’s expand and fill options so that the frame always resizes with the window.

ThemedButton follows the same pattern as ThemedFrame. The ThemedButton class extends Button. On line 12, we call Button’s __init__ method followed by configuration options on line 14. In this case, we set the button’s font to Arial 32. Then we call the pack() method.

The demonstration part is found on lines 18-21. We create a ThemedFrame object on line 19. It’s made the same way as a regular Frame. Line 20 makes a ThemedButton. The constructor is consistent with Button’s constructor, so we are free to pass attributes such as the text and callback handlers to the button. Finally, we call mainloop() on ThemedFrame. All of this works because ThemedButton and ThemedFrame are simply specialization of their parent classes.

Tk Event Handling

All GUI programs need a way to respond to user interactions. The Tk GUI toolkit provided in Python provides us with a number of different ways to respond to user interactions. Let’s look at a few different ways we can make buttons respond to user events.

Pass a Function

Since Python considers functions to be objects, we can just pass a function to the event handler.

def click():
    print('Clicked')

root = Tk()
Button(root, text='Click Me', command=click).pack()
root.mainloop()

Use a Lambda

Lamdas are another popular way to express event handling code.

root = Tk()
Button(root, text='Click Me', command=(lambda: print('Clicked'))).pack()
root.mainloop()

Use a Class

Many programs construct GUIs using Pythons OOP capabilities. As such, we can bind a class method to the event handler also.

class MyClass:
    def __init__(self, root):
        self.button = Button(root, text='Class', command=self.command).pack()

    def command(self):
        print('Class handler')

root = Tk()
MyClass(root)
root.mainloop()

Override the __call__ method

We can also construct classes that overload the __call__ operator. Doing so is useful when we need to pass complex information along to an event handler.

class MyCallable:
    def __init__(self):
        self.message = '__call__ handler'

    def __call__(self):
        print(self.message)

root=Tk()
Button(root, text='Callable', command=MyCallable()).pack()
root.mainloop()

Event Binding

We can also make direct calls to Tk

def print_me():
    print('binding')

root = Tk()

w = Button(root, text='Binding')
w.pack()
w.bind('<Button-1>, print_me)
root.mainloop()

Complete Program

Below is a complete program that demonstrates all of the above patterns.

import sys
from tkinter import *


def write():
    print('Function call')


class HelloClass:
    def __init__(self, root):
        self.button = Button(root, text='Class', command=self.command).pack(side=LEFT, fill=X)

    def command(self):
        print('Class handler')


class Callable:
    def __init__(self):
        self.message = '__call__ handler'

    def __call__(self):
        print(self.message)


def printMe(event):
    print('Double click to quit')


def quit(event):
    sys.exit()


if __name__ == '__main__':
    root = Tk()

    Button(root, text='Function', command=write).pack(side=LEFT, fill=X)
    Button(root, text='Lambda', command=(lambda: print('Labmda call'))).pack(side=LEFT, fill=X)
    HelloClass(root)
    Button(root, text='Callable', command=Callable()).pack(side=LEFT, fill=X)

    w = Button(root, text='Binding')
    w.pack(side=LEFT, fill=X)
    w.bind('<Button-1>', printMe)
    w.bind('<Double-1>', quit)

    root.mainloop()

Kotlin JDBC – RowSet Interface

The RowSet interface is a sub-interface of ResultSet and is used provide finer grade control over JDBC result sets. The RowSet interface has its own sub-interfaces that provide different features depending on the type of interface.

RowSet Sub-Interfavces

Interface Brief Description
JdbcRowSet A RowSet that is capable of being used as a JavaBeans component. The JdbcRowSet maintains a connection to the underlying database and makes the ResultSet scrollable and updateable.
CachedRowSet Caches rows in memory, allowing for the application to work on the ResultSet without maintaing an active connection to the database.
WebRowSet : CachedRowSet An extension of CachedRowSet, the WebRowSet provides XML capabilities
JoinRowSet : WebRowSet Extends WebRowSet to provide SQL JOIN capabilities.
FilterRowSet : WebRowSet Extends WebRowSet to provide filtering capabilities

Example Program

Below is an example program that demonstrates how to create an instance of RowSet.

pom.xml

<?xml version="1.0" encoding="UTF-8"?>
<project xmlns="http://maven.apache.org/POM/4.0.0"
         xmlns:xsi="http://www.w3.org/2001/XMLSchema-instance"
         xsi:schemaLocation="http://maven.apache.org/POM/4.0.0 http://maven.apache.org/xsd/maven-4.0.0.xsd">
    <modelVersion>4.0.0</modelVersion>

    <groupId>OCJP-DB</groupId>
    <artifactId>ocjpdb</artifactId>
    <version>1.0-SNAPSHOT</version>

    <properties>
        <kotlin.version>1.2.10</kotlin.version>
        <main.class>stonesoupprogramming.MainKt</main.class>
    </properties>

    <dependencies>
        <dependency>
            <groupId>org.apache.derby</groupId>
            <artifactId>derby</artifactId>
            <version>10.14.1.0</version>
        </dependency>
        <dependency>
            <groupId>org.jetbrains.kotlin</groupId>
            <artifactId>kotlin-stdlib-jre8</artifactId>
            <version>${kotlin.version}</version>
        </dependency>
        <dependency>
            <groupId>org.jetbrains.kotlin</groupId>
            <artifactId>kotlin-test</artifactId>
            <version>${kotlin.version}</version>
            <scope>test</scope>
        </dependency>

    </dependencies>

    <build>
        <sourceDirectory>src/main/kotlin</sourceDirectory>
        <plugins>
            <plugin>
                <groupId>org.jetbrains.kotlin</groupId>
                <artifactId>kotlin-maven-plugin</artifactId>
                <version>${kotlin.version}</version>
                <executions>
                    <execution>
                        <id>compile</id>
                        <phase>compile</phase>
                        <goals>
                            <goal>compile</goal>
                        </goals>
                    </execution>
                    <execution>
                        <id>test-compile</id>
                        <phase>test-compile</phase>
                        <goals>
                            <goal>test-compile</goal>
                        </goals>
                    </execution>
                </executions>
                <configuration>
                    <jvmTarget>1.8</jvmTarget>
                </configuration>
            </plugin>
            <plugin>
                <groupId>org.apache.maven.plugins</groupId>
                <artifactId>maven-jar-plugin</artifactId>
                <version>2.6</version>
                <configuration>
                    <archive>
                        <manifest>
                            <addClasspath>true</addClasspath>
                            <mainClass>${main.class}</mainClass>
                        </manifest>
                    </archive>
                </configuration>
            </plugin>
            <plugin>
                <groupId>org.codehaus.mojo</groupId>
                <artifactId>exec-maven-plugin</artifactId>
                <version>1.2.1</version>
                <executions>
                    <execution>
                        <phase>test</phase>
                        <goals>
                            <goal>java</goal>
                        </goals>
                    </execution>
                </executions>
                <configuration>
                    <mainClass>${main.class}</mainClass>
                </configuration>
            </plugin>
        </plugins>
    </build>

</project>

EmployeesRowset.kt

package stonesoupprogramming

import javax.sql.rowset.RowSetProvider

fun main (args : Array<String>){
    val rowSet  = RowSetProvider.newFactory().createWebRowSet()

    with(rowSet){
        //Connection information
        url = "jdbc:derby:stonesoup;create=true"
        username = "admin"
        password = "pw"

        //Command to execute against the database
        command = "SELECT * FROM BURGERS.EMPLOYEES"

        //Execute the command
        execute()

        //Output XML to standard out
        writeXml(System.out)
    }
}

Explanation

This program queries a table in the database and prints the XML to the standard out. We get an instance of WebRowSet by calling createWebRowSet() on line 6. Note that if we wanted a different kind of RowSet, we would just use the corresponding method on RowSetProvider. For example, if we wanted a JdbcRowSet, we would use createJdbcRowSet() instead of createWebRowSet().

The result is a RowSet object. Once we have a RowSet object, we start by populating its properties to establish a connection to the database. In this case, we pass a JDBC connection string, a username, and a password. Next, we set the command property with a SQL string.

The SQL is executed when call the execute() method. A connection is established to the database and then the RowSet object is populated with the results. Since we are using a WebRowSet, we can write the results to XML. The example program passes System.out as the output stream and the results appear on the console.

Kotlin JDBC – Savepoints

The JDBC connection object has the ability to create SavePoint objects that are used to rollback a transaction to a specific point in time. One possible use case is providing users the ability to have “Undo” options while working in a database client program. Of course, we can also use SavePoints in Exception handlers or other areas of the program as needed.

SavePoints are used when the connection’s autoCommit property is set to false. We create a SavePoint like so

val bob = connection.setSavePoint("Bob") //Name is optional

Later on, we can pass the SavePoint to the rollback() method on the connection object.

connection.rollback(bob)

Once the connection is rollback to a SavePoint, any work performed on the conncetion after the SavePoint is lost.

Below is an example program that demonstrates using SavePoints.

pom.xml

<?xml version="1.0" encoding="UTF-8"?>
<project xmlns="http://maven.apache.org/POM/4.0.0"
         xmlns:xsi="http://www.w3.org/2001/XMLSchema-instance"
         xsi:schemaLocation="http://maven.apache.org/POM/4.0.0 http://maven.apache.org/xsd/maven-4.0.0.xsd">
    <modelVersion>4.0.0</modelVersion>

    <groupId>OCJP-DB</groupId>
    <artifactId>ocjpdb</artifactId>
    <version>1.0-SNAPSHOT</version>

    <properties>
        <kotlin.version>1.2.10</kotlin.version>
        <main.class>stonesoupprogramming.MainKt</main.class>
    </properties>

    <dependencies>
        <dependency>
            <groupId>org.apache.derby</groupId>
            <artifactId>derby</artifactId>
            <version>10.14.1.0</version>
        </dependency>
        <dependency>
            <groupId>org.jetbrains.kotlin</groupId>
            <artifactId>kotlin-stdlib-jre8</artifactId>
            <version>${kotlin.version}</version>
        </dependency>
        <dependency>
            <groupId>org.jetbrains.kotlin</groupId>
            <artifactId>kotlin-test</artifactId>
            <version>${kotlin.version}</version>
            <scope>test</scope>
        </dependency>

    </dependencies>

    <build>
        <sourceDirectory>src/main/kotlin</sourceDirectory>
        <plugins>
            <plugin>
                <groupId>org.jetbrains.kotlin</groupId>
                <artifactId>kotlin-maven-plugin</artifactId>
                <version>${kotlin.version}</version>
                <executions>
                    <execution>
                        <id>compile</id>
                        <phase>compile</phase>
                        <goals>
                            <goal>compile</goal>
                        </goals>
                    </execution>
                    <execution>
                        <id>test-compile</id>
                        <phase>test-compile</phase>
                        <goals>
                            <goal>test-compile</goal>
                        </goals>
                    </execution>
                </executions>
                <configuration>
                    <jvmTarget>1.8</jvmTarget>
                </configuration>
            </plugin>
            <plugin>
                <groupId>org.apache.maven.plugins</groupId>
                <artifactId>maven-jar-plugin</artifactId>
                <version>2.6</version>
                <configuration>
                    <archive>
                        <manifest>
                            <addClasspath>true</addClasspath>
                            <mainClass>${main.class}</mainClass>
                        </manifest>
                    </archive>
                </configuration>
            </plugin>
            <plugin>
                <groupId>org.codehaus.mojo</groupId>
                <artifactId>exec-maven-plugin</artifactId>
                <version>1.2.1</version>
                <executions>
                    <execution>
                        <phase>test</phase>
                        <goals>
                            <goal>java</goal>
                        </goals>
                    </execution>
                </executions>
                <configuration>
                    <mainClass>${main.class}</mainClass>
                </configuration>
            </plugin>
        </plugins>
    </build>

</project>

Employees.kt

package stonesoupprogramming

import java.sql.Connection
import java.sql.DriverManager
import java.sql.ResultSet
import java.util.*

fun main(args: Array<String>) {
    val properties = Properties()

    //Populate the properties file with user name and password
    with(properties) {
        put("user", "admin")
        put("password", "pw")
    }

    //Open a connection to the database
    DriverManager
            .getConnection("jdbc:derby:stonesoup;create=true", properties)
            .use { connection ->
                //Set autoCommit to false to manually manage transactions
                connection.autoCommit = false

                createOrTruncateTable(connection)

                //Create an updatable result set
                val rs = connection
                        .createStatement(ResultSet.TYPE_SCROLL_SENSITIVE, ResultSet.CONCUR_UPDATABLE)
                        .executeQuery("SELECT * FROM BURGERS.EMPLOYEES")

                //Populate the table with data
                with(rs) {
                    moveToInsertRow()
                    updateInt("ID", 1);
                    updateString("NAME", "Bob")
                    insertRow()

                    val bob = connection.setSavepoint("Bob")

                    moveToInsertRow()
                    updateInt("ID", 2)
                    updateString("NAME", "Linda")
                    insertRow()

                    val linda = connection.setSavepoint("Linda")

                    moveToInsertRow()
                    updateInt("ID", 3)
                    updateString("NAME", "Tina")
                    insertRow()

                    val tina = connection.setSavepoint("Tina")

                    print("Enter Bob, Linda, or Tina => ")
                    val choice = readLine()

                    when (choice) {
                        "Bob" -> connection.rollback(bob)
                        "Linda" -> connection.rollback(linda)
                        "Tina" -> connection.rollback(tina)
                    }
                }
                //Commit the transaction
                connection.commit()


                //Read only queries are still transactions
                val rsq = connection
                        .createStatement()
                        .executeQuery("SELECT * FROM BURGERS.EMPLOYEES")
                with(rsq) {
                    while (next()) {
                        println("${getInt("ID")}\t${getString("NAME")}")
                    }
                }
                //So we need to commit this query also even though it doesn't change anything
                connection.commit()
            }
}

private fun createOrTruncateTable(connection: Connection) {
    val metaData = connection.metaData
    if (!metaData.getTables(null, "BURGERS", "EMPLOYEES", null).next()) {
        connection
                .createStatement()
                .executeUpdate("CREATE TABLE BURGERS.EMPLOYEES (ID INT PRIMARY KEY, NAME VARCHAR(255))")
    } else {
        connection
                .createStatement()
                .executeUpdate("TRUNCATE TABLE BURGERS.EMPLOYEES")
    }
    connection.commit()
}

Explanation

Our program begins by establishing a connection, preparing a table, and creating an updatable ResultSet. We start inserting into the table beginning on line 32. Line 38 is where we create our first SavePoint, after inserting Bob into the table. Once we have the bob SavePoint established, we move on and insert Linda. Linda also gets a SavePoint (line 45), followed by Tina (line 52).

The user is present with a choice on line 55. When they enter Bob, the connection is rolled back to Bob, meaning that neither Linda or Tina are inserted into the database. When the user picks Linda, the connection is rolled back to the linda SavePoint, meaning that Bob and Linda are inserted into the database, but not Tina. If Tina is picked, then all three employees are inserted into the database. Line 64 commits the transaction and the inserts are performed into the database.