Spring Security Form Login with JDBC – Kotlin

Spring Security makes it really simple to authenticate users against a database. This tutorial builds on the previous tutorial of configuring Spring Security to secure web applications.

Database Schema

Spring Security is happy to do all of the work of querying a database and validating user information provided your database conforms to the correct database schema (note, you are free to customize). Here is the sql script that is used to configure an example datasource for this project that is based of the one provided in the Spring documetation.

/* See https://docs.spring.io/spring-security/site/docs/current/reference/html/appendix-schema.html */

DROP TABLE IF EXISTS persistent_logins;
DROP TABLE IF EXISTS group_members;
DROP TABLE IF EXISTS group_authorities;
DROP TABLE IF EXISTS groups;
DROP TABLE IF EXISTS authorities;
DROP TABLE IF EXISTS users;

create table users(
  username varchar_ignorecase(50) not null primary key,
  password varchar_ignorecase(50) not null,
  enabled boolean not null
);

create table authorities (
  username varchar_ignorecase(50) not null,
  authority varchar_ignorecase(50) not null,
  constraint fk_authorities_users foreign key(username) references users(username)
);

create unique index ix_auth_username on authorities (username,authority);

create table groups (
  id bigint generated by default as identity(start with 0) primary key,
  group_name varchar_ignorecase(50) not null
);

create table group_authorities (
  group_id bigint not null,
  authority varchar(50) not null,
  constraint fk_group_authorities_group foreign key(group_id) references groups(id)
);

create table group_members (
  id bigint generated by default as identity(start with 0) primary key,
  username varchar(50) not null,
  group_id bigint not null,
  constraint fk_group_members_group foreign key(group_id) references groups(id)
);

create table persistent_logins (
  username varchar(64) not null,
  series varchar(64) primary key,
  token varchar(64) not null,
  last_used timestamp not null
);

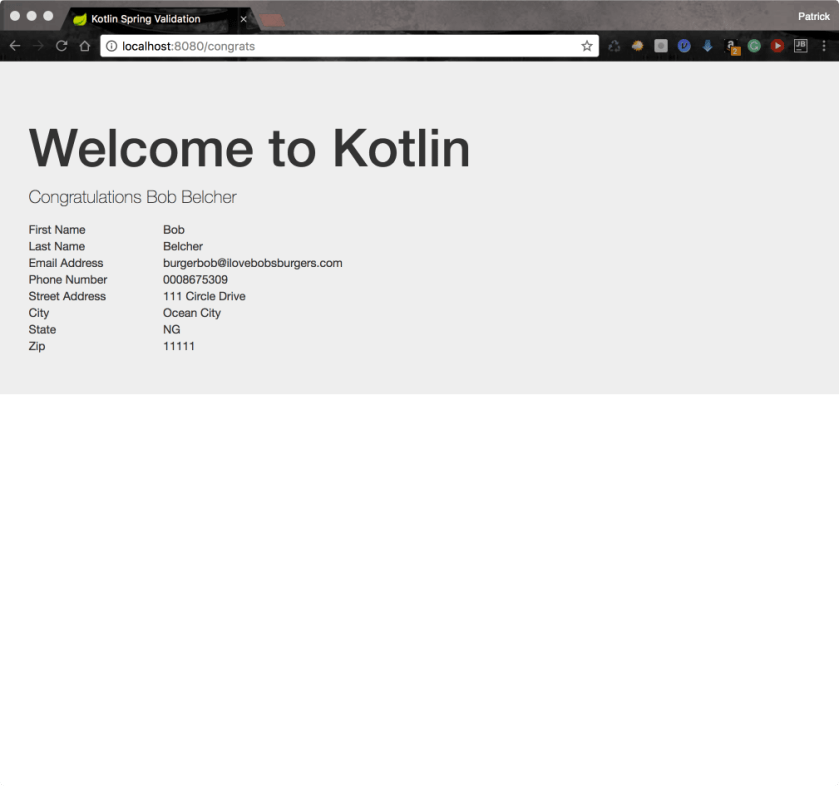
insert into users values('bob_belcher', 'burger_bob', true);
insert into authorities values ('bob_belcher', 'user');

This script drops all tables if they exist and then recreates the database tables. It also populates the database with a user: bob_belcher. Creating and destroying the DB in this fashion is useful for both development purposes and unit testing. Naturally, a production machine would preserve the data each time.

Spring Configuration

Configuring Spring Security to work with our database is a complete breeze at this point. We start by creating two bean definitions for both a data source and a jdbcTemplate.

@Configuration
class DataConfig {

    @Bean(name = arrayOf("dataSource"))
    fun dataSource() : DataSource {
        //This will create a new embedded database and run the schema.sql script
        return EmbeddedDatabaseBuilder()
                .setType(EmbeddedDatabaseType.HSQL)
                .addScript("schema.sql")
                .build()
    }

    @Bean
    fun jdbcTemplate(@Qualifier("dataSource") dataSource: DataSource) : JdbcOperations {
        return JdbcTemplate(dataSource)
    }
}

Since I am using Spring Boot, I did qualify our dataSource bean so that the container knew which bean I wanted to use for our datasource.

Now that we have our data source configured, we just need to tell Spring Security about it. It’s not very difficult.

@Configuration //Make this as a configuration class
@EnableWebSecurity //Turn on Web Security
class SecurityWebInitializer(
        //Inject our datasource into this class for the AuthenticationManagerBuilder
        @Autowired @Qualifier("dataSource") val dataSource: DataSource)
    : WebSecurityConfigurerAdapter(){

    override fun configure(http: HttpSecurity) {
        http
                    .formLogin()
                .and()
                    .logout()
                        .logoutSuccessUrl("/")
                .and()
                    .rememberMe()
                        .tokenRepository(JdbcTokenRepositoryImpl())
                            .tokenValiditySeconds(2419200)
                                .key("BurgerBob")
                .and()
                    .httpBasic()
                .and()
                    .authorizeRequests()
                        .antMatchers("/").authenticated()
                        .anyRequest().permitAll()
    }

    override fun configure(auth: AuthenticationManagerBuilder) {
        //As long as our database schema conforms to the default queries
        //we can use jdbcAuthentication and pass in our data source
        //Spring will do the rest of the work for us
        auth.jdbcAuthentication().dataSource(dataSource)
    }
}

In this case, all that is needed is to call auth.jdbcAuthentication().dataSource and pass in our dataSource object. Spring Security takes it from there.

Conclusion

Here is a video of this in action.


You can grab the entire code from my Github page here.

Kotlin Koans—Part 21

The Kotlin Koans tutorial continues with more demonstrations about the extensions on collection classes. This portion of the tutorial was a partitioning problem where I had to return the customers that have not had their orders delivered. Here is the code.

fun Shop.getCustomersWithMoreUndeliveredOrdersThanDelivered(): Set {
    // Return customers who have more undelivered orders than delivered
    return customers.partition { it.orders.all { it.isDelivered } }.second.toSet()
}

Kotlin adds a partition method to it’s collection classes. The partition method takes a lambda expression that returns a boolean. Inside of this lambda, I used the all (#TODO Link to All) method on the orders collection. Once again, I am returning a boolean value.

Now for the coolest part. Kotlin has a pair class that has a first and second method. Since I need the orders that are not delievered, I use the second property on the Pair class. At this point, second is holding a collection of Customers whose orders are not delivered. Finally, I can use the toSet (#TODO Link) method to transform the collection into a set.

Like the last few portions of this tutorial, I decided to compare the Kotlin code to the Java 8 code. Here is what I came up with.

public static Set getCustomersWithMoreUndeliveredOrdersThanDelivered(Shop shop){
    return new HashSet(shop.getCustomers()
            .stream()
            .collect(Collectors.partitioningBy((Customer c) -> c.getOrders().stream().allMatch(Order::isDelivered)))
            .get(false));
}

You can click here to see Part 20.

Kotlin Koans—Part 20

Grouping objects by a property and storing them into a map is a challenge that all developers have faced at some point in time. For example, you may have a collection of Customers and you wish to find out which Customers live in each city. Basically, you want a map where City is the key and a Collection of Customers associated with that City is the value.

This was exactly the problem that Kotlin Koans tutorial had me do.

fun Shop.groupCustomersByCity(): Map {
    // Return a map of the customers living in each city
    return customers.groupBy { it.city }
}

I was able to arrange all of the Customers by city with just one line of Kotlin code. The related Java code wasn’t that difficult either, but I did have to search for the solution since it wasn’t quite as clear as the Kotlin approach.

public static Map groupCustomersByCity(Shop shop){
    return shop.getCustomers().stream().collect(Collectors.groupingBy(Customer::getCity));
}

What helped me with the Kotlin approach was that since the groupBy method was direclty on the Collection object, my IDE was able to supply me with the groupBy method. That’s not the case with the Java approach since it’s using a static method on the Collectors class. It also didn’t occur to me to use the collect method on the Stream object either. I was looking for something that said group in it.

You can click here to see Part 19.

Kotlin Koans—Part 19

This section of the Kotlin Koans tutorial continued onward with Kotlin’s collection API enhancement. The challenge in this section use to total the price of all products a customer purchased. Here is the code

fun Customer.getTotalOrderPrice(): Double {
    // Return the sum of prices of all products that a customer has ordered.
    // Note: a customer may order the same product for several times.
    return orders.sumByDouble { it.products.sumByDouble { it.price } }
}

The collection API in Kotlin has a sumByDouble method, which takes a lambda expression. The lambda let’s developers chain function calls. In this case, each Customer had a collection of Products in each Order. To get the price of all Products ordered, I needed the sum of the price of all products in a order. This was easy enough to do because I just made a nested call to sumByDouble on it.products and then told it to sum on it.price.

Here is Java code that solves the same problem.

public static double getTotalOrderPrice(Customer customer){
    return customer
            .getOrders()
            .stream()
            .mapToDouble(
                    order -> order.getProducts()
                                    .stream()
                                    .mapToDouble(Product::getPrice)
                            .sum())
            .sum();
}

You can click here to see Part 18

Spring Bean Validation Example (JSR-303) in Kotlin

Many developers need a solution to validating forms. Spring MVC supports bean validation (JSR-303) which is an easy to use annotation driven framework that is used to validate objects. Spring utilizes bean validation throughout the entire application framework, allowing developers to annotation one or more objects and ensure they are valid from the controller all the way to the data access layer.

Since Kotlin is compatible with Java libraries, this post demonstrates how to use bean validation along with Spring MVC to validate a user registration form. Here is a screen shot of the form we are going to validate.
WelcomeScreen copy

Step 1—Define a Form Object

We will use a POJO that carries data from the view to the server. Kotlin makes this really easy because it provides data classes.

data class User(@get: NotBlank (message = "{first_name.required}")
                    var firstName : String = "",

                @get: NotBlank (message = "{last_name.required}")
                    var lastName : String = "",

                @get: NotBlank (message="{email.required}")
                @get: Email (message = "{email.invalid}")
                    var email : String = "",

                @get: NotBlank (message="{phone.required}")
                    var phone : String = "",

                @get: NotBlank (message="{address.required}")
                    var address : String = "",

                @get: NotBlank (message="{city.required}")
                    var city : String = "",

                @get: NotBlank (message="{state.required}")
                @get: Size(min=2, max=2, message = "{state.size}")
                    var state : String = "",

                @get: NotBlank (message="{zip.required}")
                    var zip : String = "")

You will notice a couple of things in the class. The first is the @get [annotation] annotation. Kotlin generates getter/setter methods in the Java bytecode. When we use the @get annotation followed by the annotation, Kotlin will place the target annotation on the getter method. So for example, @get: NotBlank is telling the Kotlin compiler to place the @NotBlank annotation on the generated getter method.

Next you will notice the message argument that is passed to the NotBlank annotation. In the first example, we have message = “{first_name.required}”. The message parameter takes a String that is displayed to the user when validation fails. If we use expression language, Spring boot will look for a ValidationMessages.properties file that contains the actual message. This is useful when making localized applications because you can have a different ValidationMessages file per language.

In this example, we are using three different Hibernate Validator annotations.

  • NotBlank—Valid if a String is not blank. Fails is the String is blank or null.
  • Email—Valid if the string field contains a valid email address
  • Size—Valid if the string has at least min number of characters and less than max characters

Step 2—ValidationMessages.properties

If you choose to use a ValidationMessages.properties file, Spring Boot will look for the actual message inside of a ValidationMessages.properties file in the applications classpath. I find this to be the preferred approach because it allows develoeprs to easily localize an application if needed. Here is the properties file we are using in this example.

first_name.required="First name is required"
last_name.required="Last name is required"
email.required="Please enter your email address"
email.invalid="Please provide a valid email address"
phone.required="Please enter a phone number"
address.required="Please enter your address"
city.required="Please enter a city"
state.required="Please enter a state"
state.size="Please use 2 letter state code"
zip.required="Enter a zip code"

The keys of the file are the same as when is passed to the message parameter of each bean validator annotation. The value is what is ultimately displayed to the user.

Step 3-Controller

Spring MVC uses a controller class. Here is the code for our controller in this example.

@Controller
@RequestMapping("/")
@Scope(WebApplicationContext.SCOPE_REQUEST)
class ValidatorController(@Autowired val registrationService: RegistrationService) {

    @RequestMapping(method = arrayOf(RequestMethod.GET))
    fun doGet(model : Model) : String {
        model.addAttribute("user", User())
        return "index"
    }

    @RequestMapping(method = arrayOf(RequestMethod.POST))
    fun doPost(@Valid user : User,  //The @Valid annotation tells Spring to Validate this object
               errors : Errors)  //Spring injects this class into this method. It will hold any
                                //errors that are found on the object
            : String {
        val result : String
        when {
            //Test for errors
            errors.hasErrors() -> result = "index"
            else -> {
                //Otherwise proceed to the next page
                registrationService.user = user
                result = "redirect:/congrats"
            }
        }
        return result
    }
}

The first method is doGet which is mapped to an HTTP Get request. Nothing fancy here for those readers who are famailier with Spring MVC (This post explains Spring MVC for users who are not famalier with Spring MVC). All we do here is create a new instance of the User class and pass it to the view.

The doPost is the method that we care about for this post. This method has two parameters. The first one is a User argument that is annotated with @Valid. The other one is an Errors object. These two argument work in tandem to validate a Spring MVC form.

The User object is bound to the web form. Each field in the form is mapped to a property on the User class. When the form is submitted, Spring MVC carries this object from the View to the Controller. However, if the parameter has the @Valid annotation, then the User object make a stop and is examaned by a class that impelements javax.validation.Validator. Should the validation report any errors, they are gathered together in the Errors object that is injected into this method.

The errors.hasErrors() method returns true if the user entered invalid input into the form. We can return the name of the page that was submitted and report the errors back to the user if that is the case. Here is what it looks like.
Invalid copy

On the other hand, we can redirect the user to the next page if everything is ok (errors.hasErrors() == false).
Congrats copy

Step 4—The View

Of course, we need to setup our web page properly in order to actually see the errors. Since I am a big fan of Twitter’s Bootstrap, I use their form validation framework to make a nice front-end display to the errors message.

Here is a code snippet of a field on the form.
field
We use a teneray expression to check each field if it has errors th:class="${#fields.hasErrors('firstName') ?'form-group has-error' : 'form-group'}". If the field has an error, we use bootstraps has-error css class to get the red outline. Otherwise, we don’t add that class and just use form-group. In case you are wondering, the fields object is the same Errors object that we were using in our server code. This is just another rendition of the same object.

The next thing to do is print out each error. This can be done very easily by using the th:each tag and assigning each message to the err variable: th:each="err: ${#fields.errors('firstName')}" class="help-block" th:text="${err}". When executed, this code will look up the message (found in ValidationMessages.properties) for each error and write is out to a span tag.

When run, each field that has an error will have its textbox outlined and the error message printed below the text box.

Getting the Code

You can get the complete code for this project at my github page.

Result

Here is the final result

Kotlin Koans—Part 18

This portion of the Kotlin Koans tutorial deals with sorting a collection functionally. As usual with Kotlin, this wasn’t a very difficult problem. As a matter of fact, it’s only one line of code.

fun Shop.getCustomersSortedByNumberOfOrders(): List {
    return customers.sortedBy { it.orders.size }
}

We basically just call the sortedBy method and place the property we want to sort by inside of the curly braces { }. In this case, I wanted to sort by the number of orders my hypothetical customer placed, so I used it.orders.size.

Just for kicks, I decided to try this in Java 8 to see the difference.

public static List getCustomersSortedByNumberOfOrders(Shop shop){
    return shop.getCustomers()
            .stream()
            .sorted(Comparator.comparingInt(customer -> customer.getOrders().size()))
            .collect(Collectors.toList());
}

Once again, we can do the same thing in Java that we can do in Kotlin at the expense of more verbosity. Also, I think in this case, the Java approach is more difficult to learn and more prone to errors since we are chaining a bunch of functions together to achieve the same result that we can do in one line of Kotlin code.

You can click here to see Part 17

Kotlin Koans—Part 17

This part of Kotlin Koans continues to build on the features Kotlin offers on collection. Most of these methods will look familiar to people who have worked with Java 8 streams.

In this portion of the tutorial, I had to work with the maxBy method. It’s a nice little shortcut method to find an item based on a property. There is also a companion minBy.

fun Shop.getCustomerWithMaximumNumberOfOrders(): Customer? {
    // Return a customer whose order count is the highest among all customers
    return customers.maxBy { it.orders.size }
}

fun Customer.getMostExpensiveOrderedProduct(): Product? {
    // Return the most expensive product which has been ordered
    return orderedProducts.maxBy { it.price }
}

I was curious about what it would take to solve this problem in Java. Here is what I came up with.

public static Optional getCustomerWithMaximumNumberOfOrders(Shop shop){
    return shop.getCustomers().stream().max(Comparator.comparingInt(lhs -> lhs.getOrders().size()));
}

I can’t say it was too brutal, but I think maxBy is much easier to read and understand as opposed to stream().max(Comparator.comparingInt(lhs -> lhs.getOrders().size()))

You can click here to see Part 16

Kotlin Koans—Part 16

This portion of the Kotlin Koans tutorial continued with collection operations. Again, many of these operations are available in JDK8, but are missing in Android Java and previous versions of JDK. I got a few different demonstrations about what you can do with Kotlin here.

Operator Overloading

Kotlin supports operator overloading. I think this was a good move. C++ has operator overloading, but it was left out in Java. At the time, some people brought up that operator overloading was a source of bugs and it impacted code readability. I used to be one of those people, but frankly, I have been swayed back towards operator overloading. Operator overloading cuts down on verbosity in your code, and I can’t truthfully say I have seen additional bugs do to operator overloading.

Here is the first portion of Kotlin code

fun Customer.isFrom(city: City): Boolean {
    // Return true if the customer is from the given city
    return this.city == city
}

All

Kotlin collections have an all { } method that accepts a predicate. You can use it check if all items in a collection match the criteria specified in the predicate.

fun Shop.checkAllCustomersAreFrom(city: City): Boolean {
    // Return true if all customers are from the given city
    return customers.all { it.city == city }
}

Any

The any { } method is similar to all, but only one item in the collection has to match the predicate for it to return true.

 fun Shop.hasCustomerFrom(city: City): Boolean {
    // Return true if there is at least one customer from the given city
    return customers.any{ it.city == city }
}

Count

Kotlin collections have a count method also that returns the number of items that match the criteria provided in the predicate.

fun Shop.countCustomersFrom(city: City): Int {
    // Return the number of customers from the given city
    return customers.count { it.city == city }
}

Find Any

We also have a find any method which returns an item that matches the criteria in the predicate.

fun Shop.findAnyCustomerFrom(city: City): Customer? {
    // Return a customer who lives in the given city, or null if there is none
    return customers.find { it.city == city }
}

it

You may have noticed it popping up in all of these lambda expressions. As long as a SAM interface has only one parameter, developers can use a special it variable to refer to that parameter.

You can click here to see Part 15

Kotlin Koans—Part 15

Kotlin supports API that is similar to what is offered by Java 8 Streams. In this portion of the Kotlin Koans tutorial, I had to work with filtering and mapping. As an added bonus, I saw a good use case for Kotlin’s operator overloading capabilities and it’s collection transformation capabilities.

Here is the Kotlin code

fun Shop.getCitiesCustomersAreFrom(): Set {
    return customers.map { it.city }.toSet()
}

fun Shop.getCustomersFrom(city: City): List {
    return customers.filter { it.city == city }
}

The first function has us extracting all cities out the customers. In this example, customer has a city property. We can therefore us the map function to drill down to the city property on customer and gather than into a collection. Once we have our customers, we can use the toSet() method to transform the collection into a set.

The second function has us using a predicate to filter customers by city. Kotlin has operator overloading so we can use the == to compare object equality in Kotlin rather than reference equality in Kotlin.

Kotlin has to offer Android developers in this case. Java developers have much of these features as of JDK 8. One thing I noticed in particular was that you do not need to call stream() on collections in Kotlin. I don’t find this to be a huge surprise however. Much of the Java 8 functionality came in the form of the new Streams api, which they attached to the collection framework. Kotlin seems to have built such features directly into the collection classes.

You can click here to see Part 14

Kotlin Koans—Part 14

I have always had a huge complaint about Java’s collection classes. The complaint involves switching between types of collections. For example, let’s suppose you have an ArrayList and you want to switch it to a set. Here is how you would do it in Java.

public class CollectionConvert {
    public static void main(String [] args){
        List lst = Arrays.asList(1, 2, 3);
        Set set = new HashSet(lst);
    }
}

Ok so let’s be honest here. It’s not as if it’s really that difficult to convert a List to a Set in Java. All of the constructors of the Java collection class accept another collection so we can pass an existing collection into a new collection to handle switching between collection types.

But let’s face the fact. It can be better than this. We are using two lines of code that could be done with one piece of code instead. Here is how it’s done in Kotlin.

fun Shop.getSetOfCustomers(): Set {
    // Return a set containing all the customers of this shop
    return customers.toSet()
}

Kotlin extends Java’s collection classes with these sort of conversion method. It may not seems like a big deal until you want to do something like this.

val lst = arrayListOf(1, 2, 3, 3, 4, 5, 6, 6, 7, 8, 9)

//Filter out duplicates and maintain a list
val noDuplicates = lst.toSet().toList()
//continue working with list instead of set...

The Set interface lacks method such as get(index). Sometimes it’s helpful to remove all duplicates in a list prior before working on the list. Java 8 does a lot of help with this problem, but I still think Kotlin is more consice.

List lst = Arrays.asList(1, 1, 1, 2, 2, 2, 3, 3, 3);
List noDuplicates = lst.stream().distinct().collect(Collectors.toList());

You can click here to see Part 13