Kotlin Spring Security Hibernate Login

In a previous post, I showed how we can use Spring Security with JDBC to store user creditionals in a database. This approach works fine in small projects but I find it to be limiting in larger applications. Many larger applications prefer to use some sort of Object Relational Mapping (ORM) library to handle storing mapped objects to a database. This post shows how to configure Spring Security to use Hibernate to look up saved users in a database.

applications.properties

Spring Boot uses an application.properties file to configure the application. By default, Spring Boot provides an embedded datastore for the application. We only need minor configuration to make it work with Hibernate.

spring.jpa.hibernate.ddl-auto=create-drop
spring.jpa.properties.hibernate.current_session_context_class=org.springframework.orm.hibernate5.SpringSessionContext
spring.datasource.driver-class-name=org.hsqldb.jdbcDriver

The first line tells the application to scan any classes marked with the @Entity annotation and create database tables for these objects. The next line configures tells it that we wish to use Hibernate. The final line tells the application which JDBC driver to use to interact with the database.

Mapped Objects

Hibernate (and other ORMS) use decorated objects to map to the database. In many cases, these are simply objects that have a list of fields and getters and setters (POJOs) and overide equals() and hashcode(). In most cases, this ends up causing a lot of boiler plate code. Kotlin provides us with data classes that cut down on the noise.

Roles

Spring Security tracks user roles throughout the application, so we need a class to represent user roles.

@Entity
data class Roles(@field: Id @field: GeneratedValue var id : Int = 0,
                 @field: ManyToOne(targetEntity = SiteUser::class) var user : SiteUser,
                 var role: String = "")

This class defines a POKO (Plain Old Kotlin Object) that represents Roles. It’s very boring, but readers will notice how to annotate fields in Kotlin [@field: [Java Annotation]]. So in the case of @Id, we just use @field: Id. The same holds true for @ManyToOne and other JPA annotations.

SiteUser

Since Spring Security has a User class, I find it to be more readable to name our persistent user as SiteUser.

@FetchProfiles(
        FetchProfile(name = "default",
                fetchOverrides = arrayOf(
                        FetchProfile.FetchOverride(entity = SiteUser::class, association = "roles", mode = FetchMode.JOIN)))
)
@Entity
data class SiteUser (@field: Id @field: GeneratedValue var id : Int = 0,
                     var userName: String = "",
                     var password: String = "",
                     var enabled : Boolean = true,
                     var accountNonExpired: Boolean = true,
                     var credentialsNonExpired: Boolean = true,
                     var accountNonLocked : Boolean = true,
                     @field: OneToMany(targetEntity = Roles::class) var roles: MutableSet = mutableSetOf()){

    //Convert this class to Spring Security's User object
    fun toUser() : User {
        val authorities = mutableSetOf()
        roles.forEach { authorities.add(SimpleGrantedAuthority(it.role)) }
        return User(userName, password,enabled, accountNonExpired, credentialsNonExpired, accountNonLocked,authorities);
    }
}

This is another data class with JPA mappings. The SiteUser class have a one to many relationship to Roles (in other words, one user can have multiple roles). Hibernate lazily loads collections by default, so unless we explicilty tell it to eager fetch our user roles, we will get a proxy error later on the in application.

There are several ways to work around this issue. We can use HQL (Hibernate Query Language) to eagerly load Roles. Another solution it to pass FetchType.Eager argument to the OneToMany annotation. A final approach is the one seen here and that’s to use Fetch Profiles to instruct Hibernate what to load. One advantage of FetchProfiles is that a class can have multiple fetch profiles, so using FetchProfiles is a highly flexible solution.

The other thing to note about this class is how to hooks into Spring Security. This class has a toUser() method which is a utility method that converts our SiteUser object into a Spring Security User object. If you look closely, the fields on our SiteUser class are the exact same fields as the User class. This makes it really easy to convert a SiteUser to a User.

Since we configured the application.properties to generate our database DDL (spring.jpa.hibernate.ddl-auto=create-drop), Hibernate will see to the details of scanning our Roles and User class and generated the necessary database tables for us. There is no further work for us to do at this point regarding the data store.

Data Configuration

Our next job is to provide Spring Security with a path to look up Users from the database.

DataConfig

Spring Security needs a path to the database in order to look up User objects. That means we are going to need Repository and Service classes in the application, but those classes depend on a SessionFactory object from Hibernate.

@Configuration
class DataConfig {
    @Bean
    fun sessionFactory(@Autowired entityManagerFactory: EntityManagerFactory) :
            SessionFactory = entityManagerFactory.unwrap(SessionFactory::class.java)
}

We really just need a bean definition for a SessionFactory. Spring Boot is configured to use JPA (Java Persistence Api), which is the ORM standard that Hibernate and other ORM libraries implement. There two main advantages of using the standard JPA rather than vendor API.

  1. Other developers are likely to know the standard API over vendor specific APIs
  2. You can swap ORM libraries when sticking to the standard

In reality, I have never been on a project that switched ORM libraries and there are times when an ORM library offers features that aren’t offered in a standard. Since we know that we are going to use Hibernate, we can just unwrap the SessionFactory object from the injected entityManagerFactory and just return the SessionFactory. At this point, we can inject SessionFactory into our classes and use Hiberante API directly.

UserRepository

UserRepository works directly with the database.

@Repository
//Inject SessionFactory into this class
class UserRepository(@Autowired private val sessionFactory: SessionFactory){

    //Used to save new users into the datastore
    fun saveOrUpdate(user: SiteUser){
        sessionFactory.currentSession.saveOrUpdate(user)
    }

    //Query the database by user name and return a SiteUser that matches
    //the user name
    fun loadByUsername(userName: String) : SiteUser =
            sessionFactory.currentSession.createCriteria(SiteUser::class.java, "su")
                    .add(Restrictions.eq("su.userName", userName)).uniqueResult() as SiteUser

    //Return all Site Users from the database
    fun allUsers(profile : String = "default") : List {
        val session = sessionFactory.currentSession
        session.enableFetchProfile(profile)
        return session.createCriteria(SiteUser::class.java).list() as List
    }
}

You will notice that we inject SessionFactory into this class. Spring Security needs to query the database by the UserName, so loadByUsername uses Hibernate’s Criteria API to create a query that searches for users that match the user name. The other two methods in this class are not related to Spring Security but are used by the application. The saveOrUpdate() method is used to persist a new user into the databse. The allUsers() method returns all users stored in the database.

UserService

The UserService class provides the glue between Spring Security and the Database.

@Transactional //Have Spring Manage Database Transactions
@Service //Mark this class as a Service layer class
class UserService(@Autowired private val userRepository: UserRepository) //Inject UserRepository into this class
    : UserDetailsService { //To work with Spring Security, it needs to implement UserDetailsService

    //Load a user by user name and call our toUser() method on SiteUser
    override fun loadUserByUsername(userName: String): UserDetails  = userRepository.loadByUsername(userName).toUser()

    //Saves a new user into the datastore
    fun saveOrUpdate(user : SiteUser){
        //Encrypt their password first
        user.password = BCryptPasswordEncoder().encode(user.password)

        //Then save the user
        userRepository.saveOrUpdate(user)
    }

    //Return all users
    fun allUsers() = userRepository.allUsers()
}

Spring provides container managed transactions when a class is marked @Transactional. The important part of this class is that it implements UserDetailsService, which allows this class to get passed to Spring Security when we configure our authentication (next section). The loadByUsername method comes from the UserDetailsService interface. It returns a User object, which means we need to call our toUser() method that we defined on SiteUser() to convert SiteUser() to User().

The other method of interest is the saveOrUpdate() method. You will notice that we encrypt our User’s password prior to saving the object to the database. This is a critical step because without it, anyone could peek into our database and get our users password. We also need to encrypt the passwords because we configure our authentication to decrypt passwords later on.

Configuring Spring Security

Now that we have a path that allows the application to access and retreive users from the databse, we are ready to configure Spring Security.

SecurityConfig

The SecurityConfig class does the work of configuring our Spring Security in this application.

@Configuration
class SecurityConfig(@Autowired private val userService : UserService) : //Inject UserService
        WebSecurityConfigurerAdapter() { //Extend WebSecurityConfigureAdaptor

    //Override this method to configure Authentication
    override fun configure(auth: AuthenticationManagerBuilder) {
        auth
                .userDetailsService(userService) //We pass our userService to userDetailsService
                .passwordEncoder(BCryptPasswordEncoder()) //Pass our Encryption Scheme also
    }

    override fun configure(http: HttpSecurity) {
        http.
                formLogin()
                    .and()
                .httpBasic()
                    .and()
                .authorizeRequests()
                    .antMatchers("/display").authenticated()
                    .anyRequest().permitAll()

    }
}

The configure(AuthenticationManagerBuilder) is our method of interest. The auth object has a userDetailsService method that accepts any class that implements UserDetailsService. Since our UserService class implements this interface, it can be used as a value for the userDetailsService method. At that point, our Security is linked to our database. The other method is passwordEncoder that takes an instance of ByCryptPasswordEncorder(), the same class used UserService to encrypt our passwords. Now the AuthenticationManagerBuilder can speak to our database and decode our passwords.

Controller Class

At this point, our application is configured to work Spring Security and a database. Our next two classes setup Spring MVC so that we have a working example.

RegisterController

RegisterController is used to add users to the application.

@Controller
@RequestMapping("/register")
class RegisterController(@Autowired private val userService: UserService){

    @RequestMapping(method = arrayOf(RequestMethod.GET))
    fun doGet(model: Model) : String{
        model.addAttribute("user", SiteUser())
        return "register"
    }

    @RequestMapping(method = arrayOf(RequestMethod.POST))
    fun doPost(siteUser: SiteUser) : String{
        userService.saveOrUpdate(siteUser)
        return "redirect:/display"
    }
}

UserDisplay

UserDisplay controls the display page and shows all users in our database.

@Controller
@RequestMapping("/display")
class UserDisplay(@Autowired private val userService: UserService){

    @RequestMapping(method = arrayOf(RequestMethod.GET))
    fun doGet(model: Model) : String{
        model.addAttribute("users", userService.allUsers())
        return "display"
    }
}

Web Pages

Finally we have our web pages. One page allows us to register a user, and the other one shows all of our users.
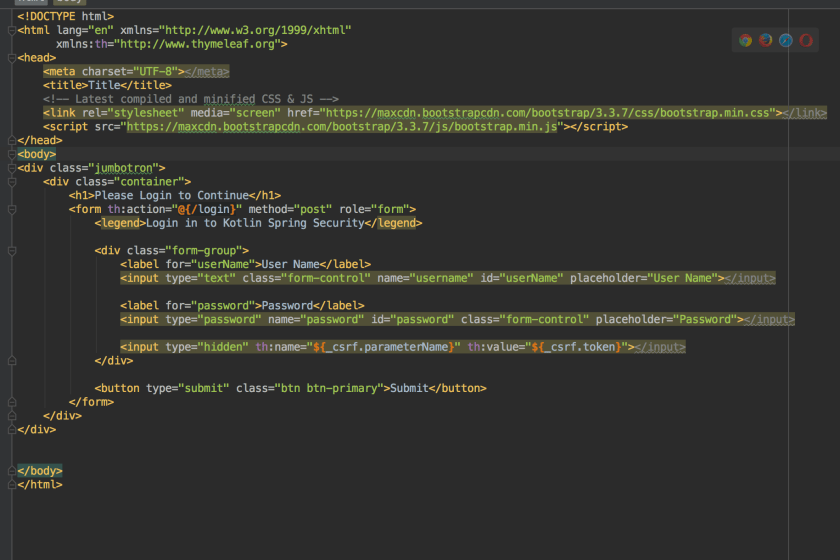
register.html

registercode

display.html

displaycode

Conclusion

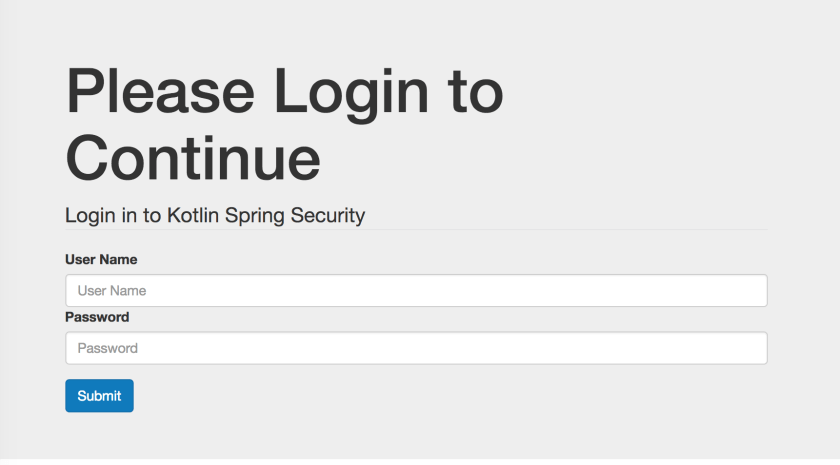
Here are some screenshots of what the working site looks like when finished.


As you can see, Spring Security works fluently with ORM solutions such as Hibernate. This makes it much easier to add and retreive users in a web application!

You can clone the full source for this project from my GitHub page here or view the YouTube view here.

Kotlin Spring JDBC Template

It’s typical for many applications, including web applications, to read and write to a database. JDBC operations are significantly simplified when using Spring JdbcTemplates and Kotlin’s language features. For example, it’s easy to one line read and insert operations into a database. This post goes through a sample web application that inserts a user into a database table and then prints a list of all users stored in the database.

Interacting with the Database

Our first order of business is to create a database schema. This is the SQL script that we will use to generate our database.

DROP TABLE IF EXISTS USERS;

CREATE TABLE USERS (
  id INTEGER IDENTITY,
  first_name VARCHAR(50),
  last_name VARCHAR(50),
  email VARCHAR(50),
  phone VARCHAR(50),
)

Now we will define a database that maps to the information held in our database. Kotlin’s data classes are ideal for this sort of task.

//Define a data class that maps to both our
//form and database table
data class User(var firstName: String = "",
                var lastName: String = "",
                var email: String = "",
                var phone: String = "")

There isn’t anything special about our User class. It’s only job is to carry information from the view to the database and back from the database to the view. Now that we have a database table and a transfer object, we need to configure our datasource so that Spring can connect our application to our database. We will define a configuration class that will define some Spring beans for us.

@Configuration
class Configuration {

    //First configure a data source that
    //generates an embedded db
    @Bean(name = arrayOf("dataSource"))
    fun dataSource(): DataSource {

        //This will create a new embedded database and run the schema.sql script
        return EmbeddedDatabaseBuilder()
                .setType(EmbeddedDatabaseType.HSQL)
                .addScript("schema.sql")
                .build()
    }

    //Create a JdbcTemplate Bean that connects to our database
    @Bean
    fun jdbcTemplate(@Qualifier("dataSource") dataSource: DataSource): JdbcTemplate {
        return JdbcTemplate(dataSource)
    }
}

The first bean, dataSource, returns an EmbeddedDatabaseBuilder object that does the work of creating an embedded database, setting it’s dialect, and running our schema.sql script to create the database definition. At this point, our database is fully ready when the build() method is called.

The next bean is a JdbcTemplate object. We create a bean definition for it so that we can inject instances of this object into our repository classes later on. The JdbcTemplate requires a DataSource object, which happens to point at our embedded database. Now let’s define a repository class that will actually work with our JdbcTemplate.

@Repository
class IndexRepository(@Autowired var jdbcTemplate: JdbcTemplate) {


    fun addUser(user: User) {
        //We can use SimpleJdbcInsert to insert a value into our table
        //The becomes super concise when combined with Kotlins apply and mapOf functions
        SimpleJdbcInsert(jdbcTemplate).withTableName("USERS").apply {
            setGeneratedKeyName("id")
            execute(
                    mapOf("first_name" to user.firstName,
                            "last_name" to user.lastName,
                            "email" to user.email,
                            "phone" to user.phone))
        }
    }

    //This allows us to query the Users table and return a list of users
    //This is one method call to jdbcTemplate with a lambda expression which makes the code
    //incredibly concise
    fun allUsers(): List = jdbcTemplate.query("SELECT FIRST_NAME, LAST_NAME, EMAIL, PHONE FROM USERS",
            { rs: ResultSet, _: Int ->
                User(rs.getString("first_name"), rs.getString("last_name"), rs.getString("email"), rs.getString("phone"))
            })
}

@Respository is a Spring sterotype annotation that marks our IndexRepository as a class that is intended to interact with the datasource. Spring provides two other stereotype annotations, @Controller and @Service, that are typically used to mark seperations in the application. @Controller is intended to interact with the view, while @Respository works with datasource. @Service should contain business logic. When developers follow this pattern, the application maintains loose coupling which makes it easy to maintain and test code.

Since IndexController is marked with @Repository, it makes sense to inject JdbcTemplate into this class so that it can work with the database. We have two methods in this class: addUser and allUsers. We’ll take each function on its own.

The addUser(user : User) method performs an insert into the database. We create an instance of SimpleJdbcInsert and pass our JdbcTemplate object into this class. The following call to withTable(“USERS”) specifies which table we are inserting a record into. Since our primary key is generated automatically by the database, we can use SimpleJdbcInsert.setGeneratedKeyName(“id”) to assign a primary key. Finally we use the execute() function to actually perform the insertion into the database. The execute() takes a map where the key is the name of the column in the database and the value is what we are inserting into the column.

There is some Kotlin magic that helps keep the code concise. For one, we are chaining our calls to setGeneratedKeyName() and execute() inside of the apply() function. We can also leverage Kotlin’s mapOf() function to generate a Map on the fly as opposed to creating a map object and populating it with values ahead of time.

The allUsers() function queries the database. In this case, we can call the query method from the jdbcTemplate object. The query() method requires two parameters. The first parameter is the query that is sent to the database. The second method is a an instance of RowMapper, which is a single abstract method (SAM) class. Since RowMapper has only one method, we can use a lambda expression to provide an implementation of RowMapper.

The RowMapper’s job is to transform the results of the database query into a User object. It provides with two objects that help with this job. The first is the good old JDBC ResetSet object and the other object is an Int that represents the row number. We only use the ResultSet in this example. The ResultSet interface has a getString() method that takes the name of the column and outputs the value stored in that column. Using getString(), we can populate each field of a User object and return it. RowMapper will handle the details of building a list and returning the List to the caller.

Web Portion

The remaining part of the application is a Spring MVC application. We aren’t going to spend a lot of time on this portion but are including it for After the @Repository tier (covered above), we have a service class that handles the business logic between the @Controller and the @Repository. In our case, it’s really boring because all our @Service class is doing is acting as a wrapper for our @Repository class, but in the real world, there is generally more application code located in this class.

@Service
class IndexService(
    //Inject IndexRepository here
    @Autowired var indexRepository: IndexRepository) {

    fun addUser(user: User) {
        indexRepository.addUser(user)
    }

    fun allUsers(): List {
        return indexRepository.allUsers()
    }
}

We also have a @Controller class that handles HTTP GET and POST requests.

@Controller
@RequestMapping("/")
class IndexController(@Autowired var indexService: IndexService) {

    @RequestMapping(method = arrayOf(RequestMethod.GET))
    fun doGet(model: Model): String {
        model.addAttribute("user", User())
        model.addAttribute("allUsers", indexService.allUsers())
        return "index"
    }

    @RequestMapping(method = arrayOf(RequestMethod.POST))
    fun doPost(model: Model, user: User): String {
        indexService.addUser(user)

        model.addAttribute("user", User())
        model.addAttribute("allUsers", indexService.allUsers())
        return "index"
    }
}

And finally the view…
View

Conclusion

Kotlin greatly enchances the already excellent JDBC abilities offered by Spring Boot. As was demonstrated in this post, developers can start with definining a data class that holds all of the data in a single row in a database table. When it comes to actually perform inserts or queries from the database, Kotlin’s mapOf(), apply, and to functions cut down on any additional verbosity that might still remain from using JDBC Template. As always, Spring makes it super simple to spring up a web application that interfaces with a database.

You can grab the source for this example from my GitHub page or view the Video tutorial on YouTube.

Kotlin Koans—Part 23

This portion of the Kotlin Koans tutorial appeared to be a review of the concepts I had been working on throughout the collection section. I had to solve three different problems using the collections API. While doing this, I got to revist the Elivis operator (?:), map, maxBy, sumBy, filter, count, and toSet.

Get Customers Who Ordered Product

This problem focused on filtering.

fun Shop.getCustomersWhoOrderedProduct(product: Product): Set {
    // Return the set of customers who ordered the specified product
    return customers.filter { it.orderedProducts.contains(product) }.toSet()
}

The filter method takes a predicate that returns true or false. In this case, I just used the contains method on orderedProducts. If the product is found in orderedProducts, we get a true, otherwise false. Then there is a toSet() operation to transform the collection to a set.

Get Most Expensive Delived Products

This problem was a little more challenging. I had to go back and review how to use the Elivis operator (TODO: Link).

fun Customer.getMostExpensiveDeliveredProduct(): Product? {
    // Return the most expensive product among all delivered products
    // (use the Order.isDelivered flag)
    return orders.filter { it.isDelivered }.map { it.products.maxBy { it.price } }.maxBy { it?.price ?: 0.0}
}

I started with a filter operation to check if an order was delivered or not since the problem statement required me to find the most expensive delivered product. Then I had to use a map operation which allowed me to traverse all delivered orders. At this point, I could use a maxBy operation and check it.price. This builds up a collection of products that contains the most expensive product on each order.

The next part of the operation is to find the most expensive product of all orders. At this point, I have a collection of products so I just needed another maxBy operation. However it was a little more trickey this time. In this case, there was a possibily that the variable it could be null. It’s nice that Kotlin has compiler checks for this sort of thing because I truthfully didn’t realize that I could be working with null objects here. Thus, I had to use the Elvis operator in this final lambda operation.

Get Number Of Times Product Was Ordered

I had to solve this problem by chaining transformations together again.

fun Shop.getNumberOfTimesProductWasOrdered(product: Product): Int {
    // Return the number of times the given product was ordered.
    // Note: a customer may order the same product for several times.
    return customers.sumBy { it.orders.sumBy { it.products.count { it == product } } }
}

A customer has a one to many relationship with orders, and orders have a one to many relationship with products. I needed two sumBy operations to solve this problem. I began with a sumBy on customers. Inside of the lambda, I did another sumBy operation on orders. Once I was traversing orders, I could do a count operation on products and get a total of how many products matched my predicate.

The it.products.count returns a number that gets fed into it.orders.sumBy. The it.orders.sumBy returns a number that gets fed into customers.sumBy. Once customers.sumBy returns, we have a count of the total number of times the specified product was ordered.

You can click here to see Part 22

Kotlin Spring Security Custom Login

Spring Security provides a custom login page that is functional but not very attractive. In most cases, web developers want a more attractive looking login page. This post demonstrates how to configure Spring Security to use a custom login page. Readers can view this tutorial for a demonstration on how to configure basic Spring Security.

Front End—Write a Custom Page

We are going to start by writing a custom login page. Spring Security is very flexible about the page itself, but there are a few rules that need to be followed.

  • Form requires Username
  • Form requires Password
  • CSRF Token is required

This is a screen shot of the page that will be used for this tutorial.
LoginPage
Followed by the code.
LoginCode
It’s critical to remember to include the CSRF token in the form. Without it, the server will refuse any HTTP POST requests and will respond with code 405. The th:name="${_csrf.parameterName}" th:value="${_csrf.token}" on an input take will do the job of adding the CSRF token.

Backend—Configure Spring

Once the front end code is ready, you need to configure Spring Security to use this page. In order to render the login page, Spring will need some sort of controller class. Developers are free to write their own, but it’s also trivial to make use of the one Spring is happy to provide.

@Configuration
class WebConfig : WebMvcConfigurerAdapter() {
    override fun addViewControllers(registry: ViewControllerRegistry) {
        //This class adds a default controller for the login page.
        //Otherwise you would need to write a custom controller class
        registry.addViewController("/login").setViewName("login")
    }
}

The next job is to configure Spring security.

@Configuration //Make this as a configuration class
@EnableWebSecurity //Turn on Web Security
class SecurityWebInitializer : WebSecurityConfigurerAdapter(){
    override fun configure(http: HttpSecurity) {
        http
                .authorizeRequests()
                    //We need to allow anonymous users to
                    //access the login page (otherwise we get 403)
                    .antMatchers("/login").anonymous()
                    .anyRequest().authenticated()
                .and()
                    //Setup a custom login page
                    .formLogin()
                        .loginPage("/login")
                        .usernameParameter("username")
                        .passwordParameter("password")
                .and()
                    .httpBasic()
    }

    override fun configure(auth: AuthenticationManagerBuilder) {
        //This code sets up a user store in memory. This is
        //useful for debugging and development
        auth
                .inMemoryAuthentication()
                    .withUser("bob")
                    .password("belcher")
                    .roles("USER")
                .and()
                    .withUser("admin")
                    .password("admin")
                    .roles("USER", "ADMIN")
    }
}

It’s important to allow anonymous() access to the login page. Without it, Spring Security will continue to redirect to the login page until the server returns 403 (too many redirects).

Conclusion

Once complete, the site will render a custom login page like what is shown in the video.


You can get the code for the complete project at my GitHub page.

Kotlin Koans—Part 22

More functional programming on the horizon. This portion of Kotlin Koans demonstrated folding. I personally had never tackled a challenge like this so it took me more time to figure it out than the other problems. My job was to go through all customers and the products they ordered and reduce them down to a single set of objects. Here is the Kotlin code.

fun Shop.getSetOfProductsOrderedByEveryCustomer(): Set {
    // Return the set of products ordered by every customer
    return customers.fold(allOrderedProducts, {
        orderedByAll, customer ->
            orderedByAll.intersect(customer.orderedProducts)
    })
}

As usual, I tried to do the same problem in Java for comparison purposes, but I wasn’t able to figure it out! (If you know the solution, please leave it in the comments section!). I’ll have to admit that I am weak in some of the functional programming areas.

You can click here to see Part 21.

Spring Security Form Login with JDBC – Kotlin

Spring Security makes it really simple to authenticate users against a database. This tutorial builds on the previous tutorial of configuring Spring Security to secure web applications.

Database Schema

Spring Security is happy to do all of the work of querying a database and validating user information provided your database conforms to the correct database schema (note, you are free to customize). Here is the sql script that is used to configure an example datasource for this project that is based of the one provided in the Spring documetation.

/* See https://docs.spring.io/spring-security/site/docs/current/reference/html/appendix-schema.html */

DROP TABLE IF EXISTS persistent_logins;
DROP TABLE IF EXISTS group_members;
DROP TABLE IF EXISTS group_authorities;
DROP TABLE IF EXISTS groups;
DROP TABLE IF EXISTS authorities;
DROP TABLE IF EXISTS users;

create table users(
  username varchar_ignorecase(50) not null primary key,
  password varchar_ignorecase(50) not null,
  enabled boolean not null
);

create table authorities (
  username varchar_ignorecase(50) not null,
  authority varchar_ignorecase(50) not null,
  constraint fk_authorities_users foreign key(username) references users(username)
);

create unique index ix_auth_username on authorities (username,authority);

create table groups (
  id bigint generated by default as identity(start with 0) primary key,
  group_name varchar_ignorecase(50) not null
);

create table group_authorities (
  group_id bigint not null,
  authority varchar(50) not null,
  constraint fk_group_authorities_group foreign key(group_id) references groups(id)
);

create table group_members (
  id bigint generated by default as identity(start with 0) primary key,
  username varchar(50) not null,
  group_id bigint not null,
  constraint fk_group_members_group foreign key(group_id) references groups(id)
);

create table persistent_logins (
  username varchar(64) not null,
  series varchar(64) primary key,
  token varchar(64) not null,
  last_used timestamp not null
);

insert into users values('bob_belcher', 'burger_bob', true);
insert into authorities values ('bob_belcher', 'user');

This script drops all tables if they exist and then recreates the database tables. It also populates the database with a user: bob_belcher. Creating and destroying the DB in this fashion is useful for both development purposes and unit testing. Naturally, a production machine would preserve the data each time.

Spring Configuration

Configuring Spring Security to work with our database is a complete breeze at this point. We start by creating two bean definitions for both a data source and a jdbcTemplate.

@Configuration
class DataConfig {

    @Bean(name = arrayOf("dataSource"))
    fun dataSource() : DataSource {
        //This will create a new embedded database and run the schema.sql script
        return EmbeddedDatabaseBuilder()
                .setType(EmbeddedDatabaseType.HSQL)
                .addScript("schema.sql")
                .build()
    }

    @Bean
    fun jdbcTemplate(@Qualifier("dataSource") dataSource: DataSource) : JdbcOperations {
        return JdbcTemplate(dataSource)
    }
}

Since I am using Spring Boot, I did qualify our dataSource bean so that the container knew which bean I wanted to use for our datasource.

Now that we have our data source configured, we just need to tell Spring Security about it. It’s not very difficult.

@Configuration //Make this as a configuration class
@EnableWebSecurity //Turn on Web Security
class SecurityWebInitializer(
        //Inject our datasource into this class for the AuthenticationManagerBuilder
        @Autowired @Qualifier("dataSource") val dataSource: DataSource)
    : WebSecurityConfigurerAdapter(){

    override fun configure(http: HttpSecurity) {
        http
                    .formLogin()
                .and()
                    .logout()
                        .logoutSuccessUrl("/")
                .and()
                    .rememberMe()
                        .tokenRepository(JdbcTokenRepositoryImpl())
                            .tokenValiditySeconds(2419200)
                                .key("BurgerBob")
                .and()
                    .httpBasic()
                .and()
                    .authorizeRequests()
                        .antMatchers("/").authenticated()
                        .anyRequest().permitAll()
    }

    override fun configure(auth: AuthenticationManagerBuilder) {
        //As long as our database schema conforms to the default queries
        //we can use jdbcAuthentication and pass in our data source
        //Spring will do the rest of the work for us
        auth.jdbcAuthentication().dataSource(dataSource)
    }
}

In this case, all that is needed is to call auth.jdbcAuthentication().dataSource and pass in our dataSource object. Spring Security takes it from there.

Conclusion

Here is a video of this in action.


You can grab the entire code from my Github page here.

Kotlin Spring Security Tutorial

Just about anybody can appreciate the value of securing a web application. After all, who would do their online banking on an unsecured website? Of course, it’s not just online banking that requires security. Just about any website that has information that requires protecting needs security.

Spring provides web security modules that help us secure our applications. As with everything in Spring, it’s really easy to use an configure.

Define a Security Class

Spring has us extend the WebSecurityConfigurerAdapter class and annotate it with @Configuration and @EnableWebSecurity. Here is an example Kotlin class that enables our web security and forces all requests to the web application to be authenticated.

@Configuration //Make this as a configuration class
@EnableWebSecurity //Turn on Web Security
class SecurityWebInitializer : WebSecurityConfigurerAdapter(){
    override fun configure(http: HttpSecurity) {
        //This tells Spring Security to authorize all requests
        //We use formLogin and httpBasic
        http
                .authorizeRequests()
                    .anyRequest()
                    .authenticated()
                .and()
                    .formLogin()
                .and()
                    .httpBasic()
    }

    override fun configure(auth: AuthenticationManagerBuilder) {
        //This code sets up a user store in memory. This is
        //useful for debugging and development
        auth
                .inMemoryAuthentication()
                    .withUser("bob")
                    .password("belcher")
                    .roles("USER")
                .and()
                    .withUser("admin")
                    .password("admin")
                    .roles("USER", "ADMIN")
    }
}

The first method, configure(http: HttpSecurity) calls methods on the http object. This class has a chaining interface and by calling the proper methods, we can tailor the security configuration to suit our needs. The methods are plain english, so the code ends up being highly self-documenting.

The other configure method accepts an auth: AuthenticationManagerBuild. The auth object is used to configure a data store for users. For the purposes of this post, we are creating an inMemoryAuthentication. This is useful for development and debugging purposes.

The Controller Class

There isn’t anything special about the controller class. That’s a feature of Spring Security. Security is a cross cutting concern which means that the main application code should not have to concern itself with security. Instead, Spring uses Aspect Orientated programming to secure our application.

Sometimes it’s useful to know what user is logged into this system. There is a an example of how to access this information and pass it back to the view. (Readers who are not familiar with Spring MVC can refer here for an example of Spring MVC).

@Controller
@RequestMapping("/")
class IndexController {

    @RequestMapping(method = arrayOf(RequestMethod.GET))
    fun doGet(model : Model) : String {
        //We can access the current user like this
        val authorization = SecurityContextHolder.getContext().authentication

        //Send the user name back to the view
        model.addAttribute("username", authorization.name)
        return "index"
    }
}

The SecurityContextHolder class provides an access point to the current logged in user. Spring calls it an authentication. The object returns contains information about the user such as the user name.

Conclusion

Here is a video of logging into this site in action.


You can get the code from my github page here.

Kotlin Koans—Part 21

The Kotlin Koans tutorial continues with more demonstrations about the extensions on collection classes. This portion of the tutorial was a partitioning problem where I had to return the customers that have not had their orders delivered. Here is the code.

fun Shop.getCustomersWithMoreUndeliveredOrdersThanDelivered(): Set {
    // Return customers who have more undelivered orders than delivered
    return customers.partition { it.orders.all { it.isDelivered } }.second.toSet()
}

Kotlin adds a partition method to it’s collection classes. The partition method takes a lambda expression that returns a boolean. Inside of this lambda, I used the all (#TODO Link to All) method on the orders collection. Once again, I am returning a boolean value.

Now for the coolest part. Kotlin has a pair class that has a first and second method. Since I need the orders that are not delievered, I use the second property on the Pair class. At this point, second is holding a collection of Customers whose orders are not delivered. Finally, I can use the toSet (#TODO Link) method to transform the collection into a set.

Like the last few portions of this tutorial, I decided to compare the Kotlin code to the Java 8 code. Here is what I came up with.

public static Set getCustomersWithMoreUndeliveredOrdersThanDelivered(Shop shop){
    return new HashSet(shop.getCustomers()
            .stream()
            .collect(Collectors.partitioningBy((Customer c) -> c.getOrders().stream().allMatch(Order::isDelivered)))
            .get(false));
}

You can click here to see Part 20.

Kotlin Koans—Part 20

Grouping objects by a property and storing them into a map is a challenge that all developers have faced at some point in time. For example, you may have a collection of Customers and you wish to find out which Customers live in each city. Basically, you want a map where City is the key and a Collection of Customers associated with that City is the value.

This was exactly the problem that Kotlin Koans tutorial had me do.

fun Shop.groupCustomersByCity(): Map {
    // Return a map of the customers living in each city
    return customers.groupBy { it.city }
}

I was able to arrange all of the Customers by city with just one line of Kotlin code. The related Java code wasn’t that difficult either, but I did have to search for the solution since it wasn’t quite as clear as the Kotlin approach.

public static Map groupCustomersByCity(Shop shop){
    return shop.getCustomers().stream().collect(Collectors.groupingBy(Customer::getCity));
}

What helped me with the Kotlin approach was that since the groupBy method was direclty on the Collection object, my IDE was able to supply me with the groupBy method. That’s not the case with the Java approach since it’s using a static method on the Collectors class. It also didn’t occur to me to use the collect method on the Stream object either. I was looking for something that said group in it.

You can click here to see Part 19.

Kotlin Koans—Part 19

This section of the Kotlin Koans tutorial continued onward with Kotlin’s collection API enhancement. The challenge in this section use to total the price of all products a customer purchased. Here is the code

fun Customer.getTotalOrderPrice(): Double {
    // Return the sum of prices of all products that a customer has ordered.
    // Note: a customer may order the same product for several times.
    return orders.sumByDouble { it.products.sumByDouble { it.price } }
}

The collection API in Kotlin has a sumByDouble method, which takes a lambda expression. The lambda let’s developers chain function calls. In this case, each Customer had a collection of Products in each Order. To get the price of all Products ordered, I needed the sum of the price of all products in a order. This was easy enough to do because I just made a nested call to sumByDouble on it.products and then told it to sum on it.price.

Here is Java code that solves the same problem.

public static double getTotalOrderPrice(Customer customer){
    return customer
            .getOrders()
            .stream()
            .mapToDouble(
                    order -> order.getProducts()
                                    .stream()
                                    .mapToDouble(Product::getPrice)
                            .sum())
            .sum();
}

You can click here to see Part 18